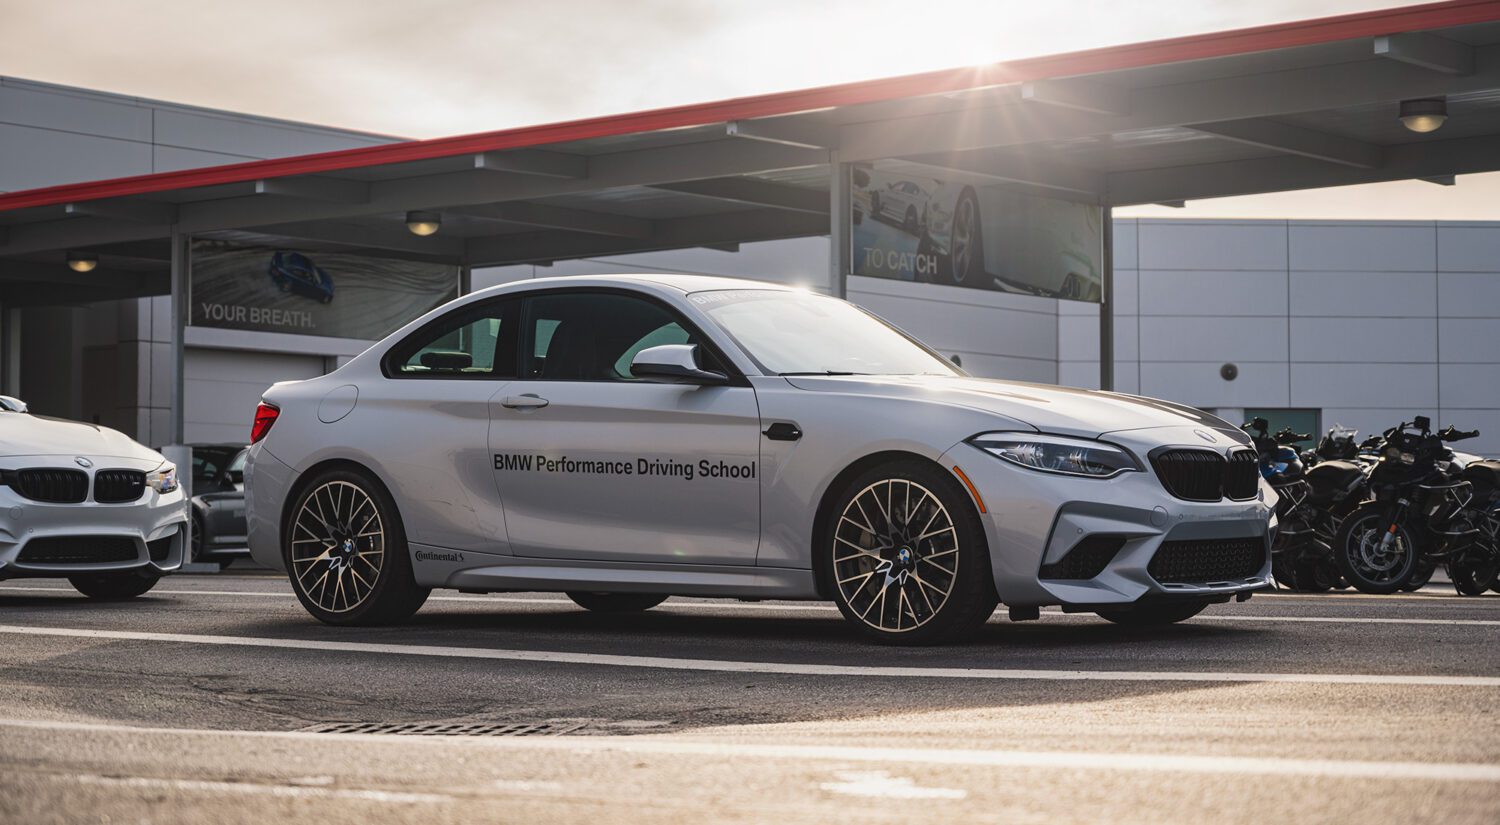
“Mike, how come no more photography stories?” Well, writing about cars is more fun, and it’s also a much broader topic. But I recently went to the Indianapolis Motor Speedway to shoot for the BMW Performance Driving School, and that means some specialized shots with big boy toys (and pro drivers). After years of observing people posting their camera gear and shutter settings, I’m going to show you what really matters when shooting rollers, and what it’s like behind the scenes.
Buckle up. Or not, since we’ll be hanging out the back of a car.
Picking the right cars for shooting rollers
Shooting with the school means the BMW buffet is open. Before we even arrive, they provide me with a list of the kinds of cars they have on location, and what color they are.
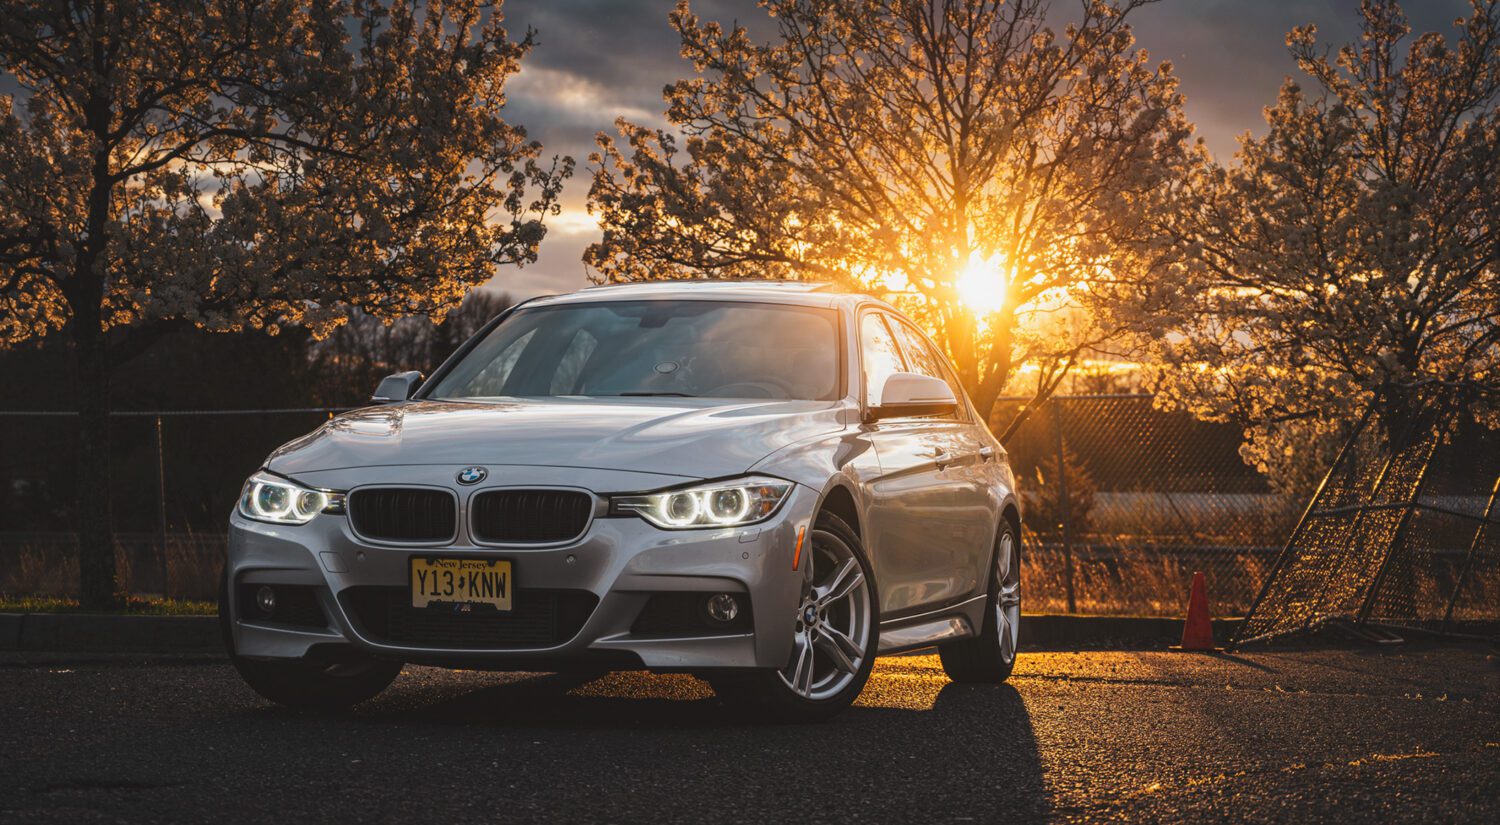
Since the agency I’m shooting for will use these images throughout next season, I try to plan ahead. Sorry, F90 M5. Ditto, M4 GT4. These cars are already out of production, and once the school uses them up, they won’t make a return in 2024. Skip.
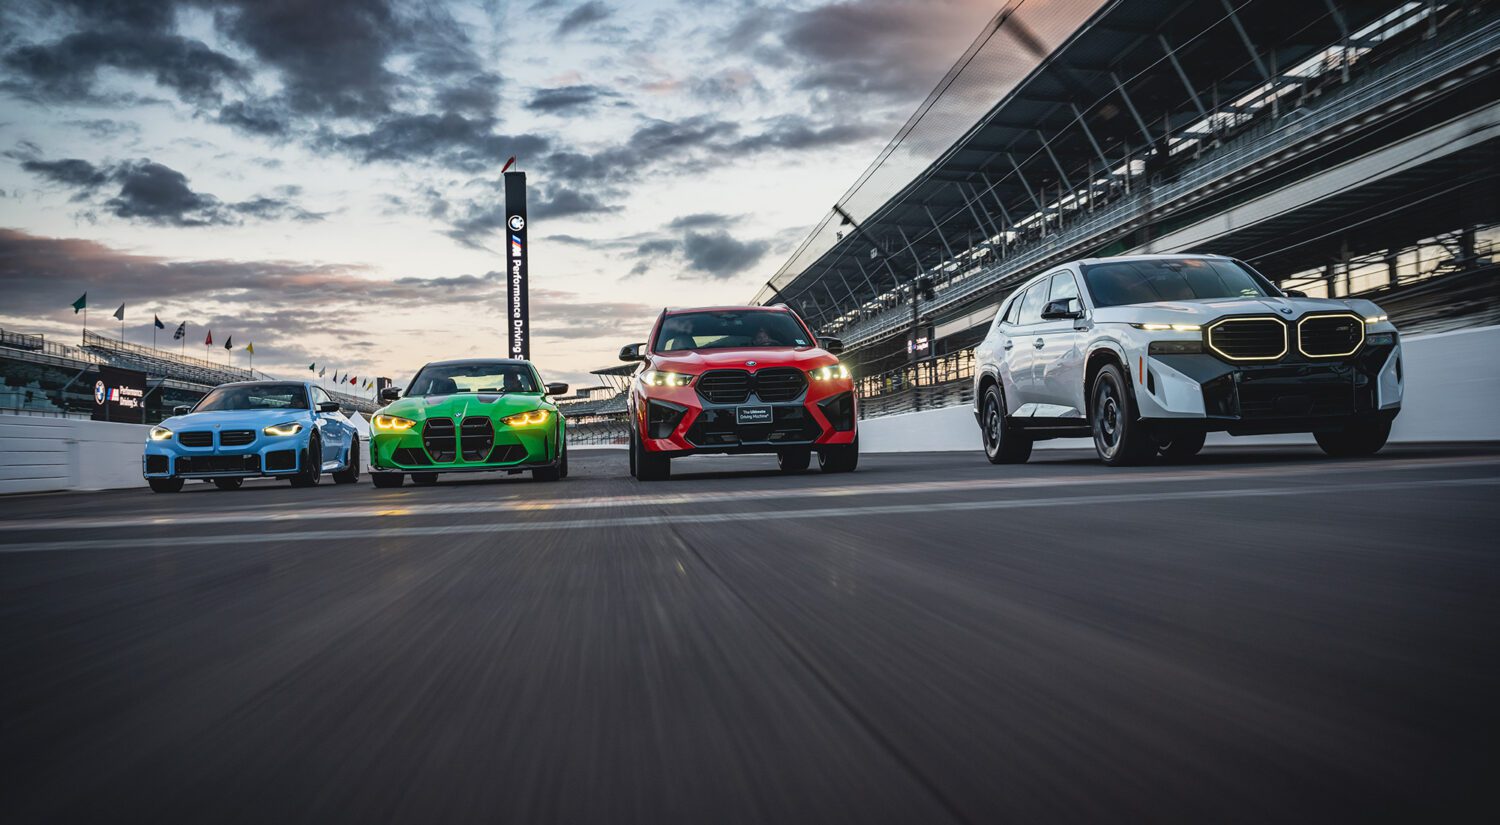
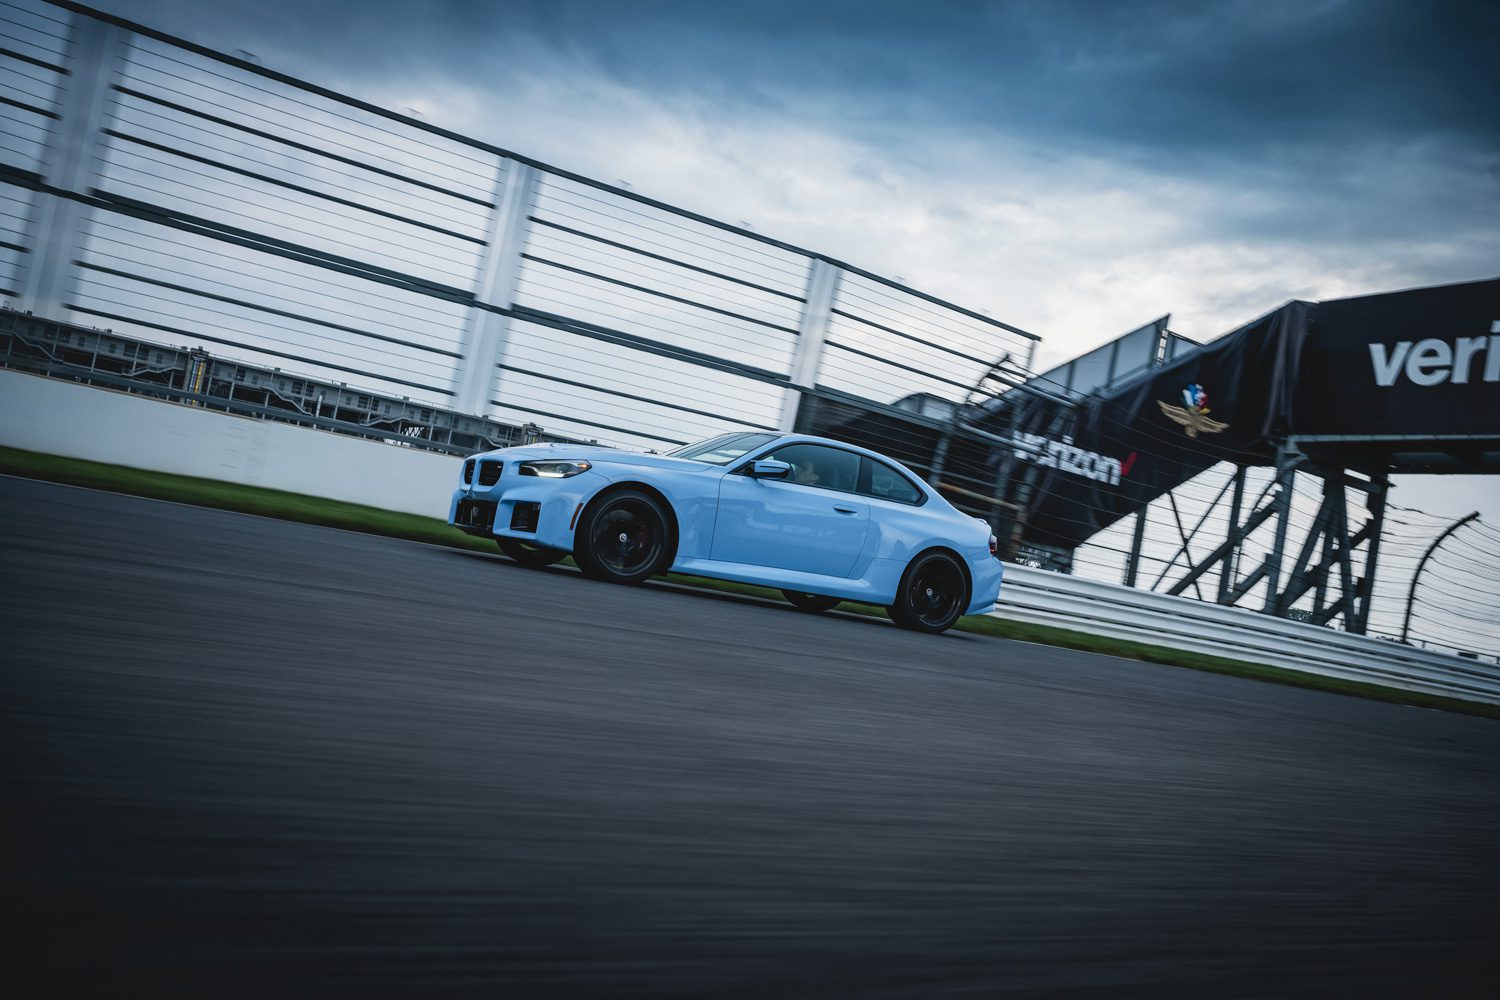
Instead, it’s a heavy dose of M3 and M4, along with the introduction of the plucky M2. The 2 is mainly used for autocross, while the 3 gets the wet skip pad treatment, and the 3 and 4 go on the big track. I keep the spots in mind to a degree, so we’re accurate in representing what the school does.
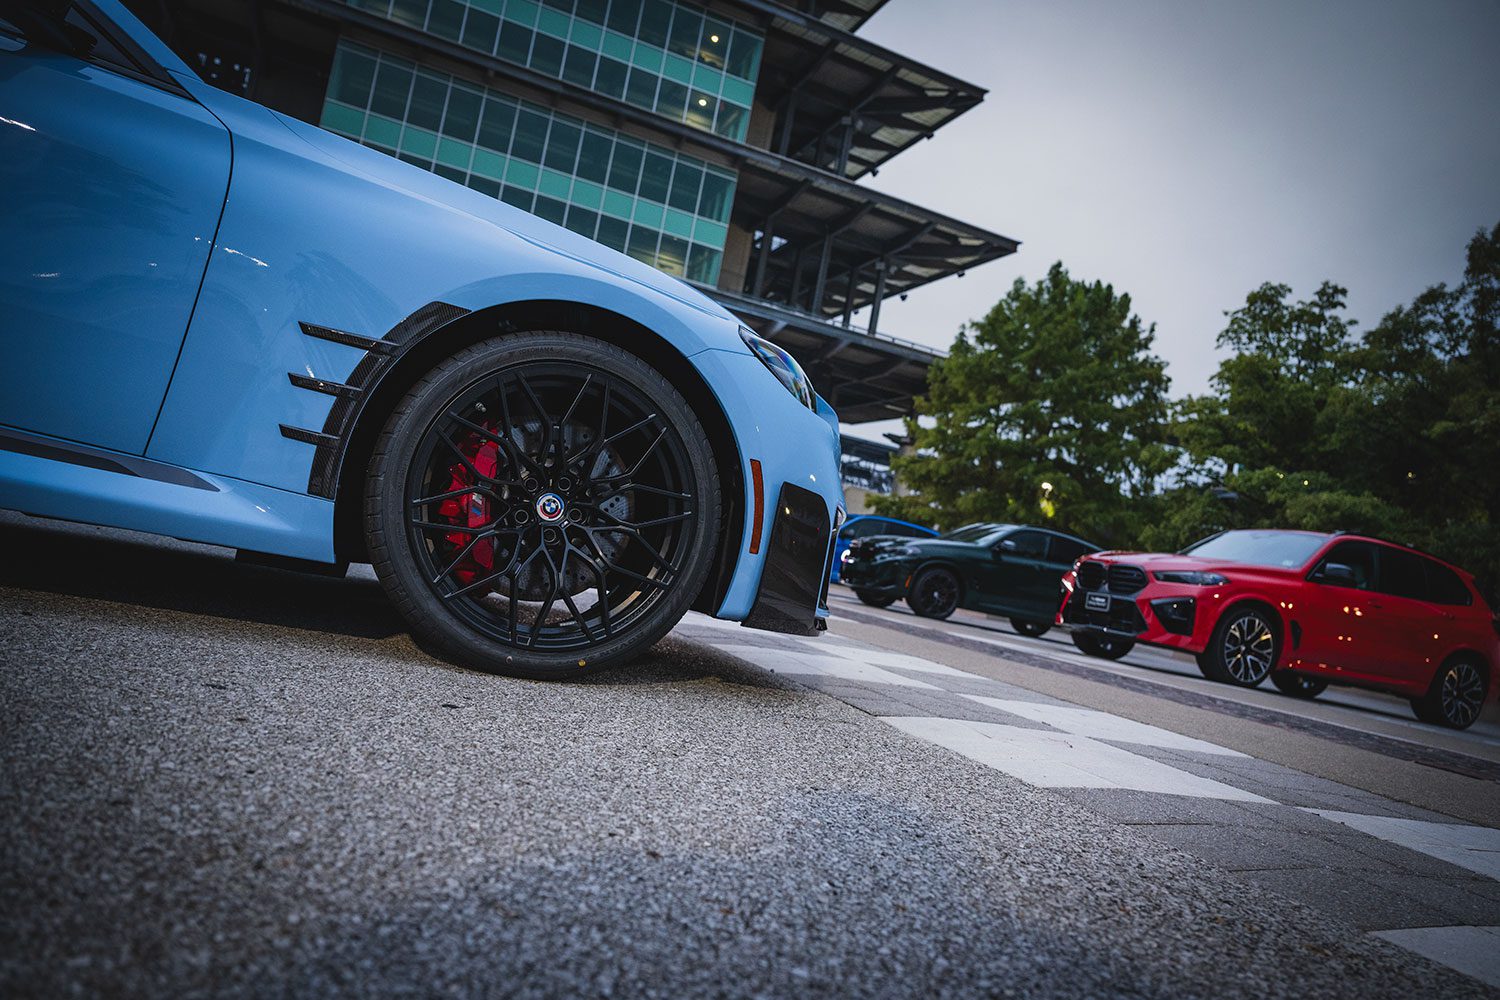
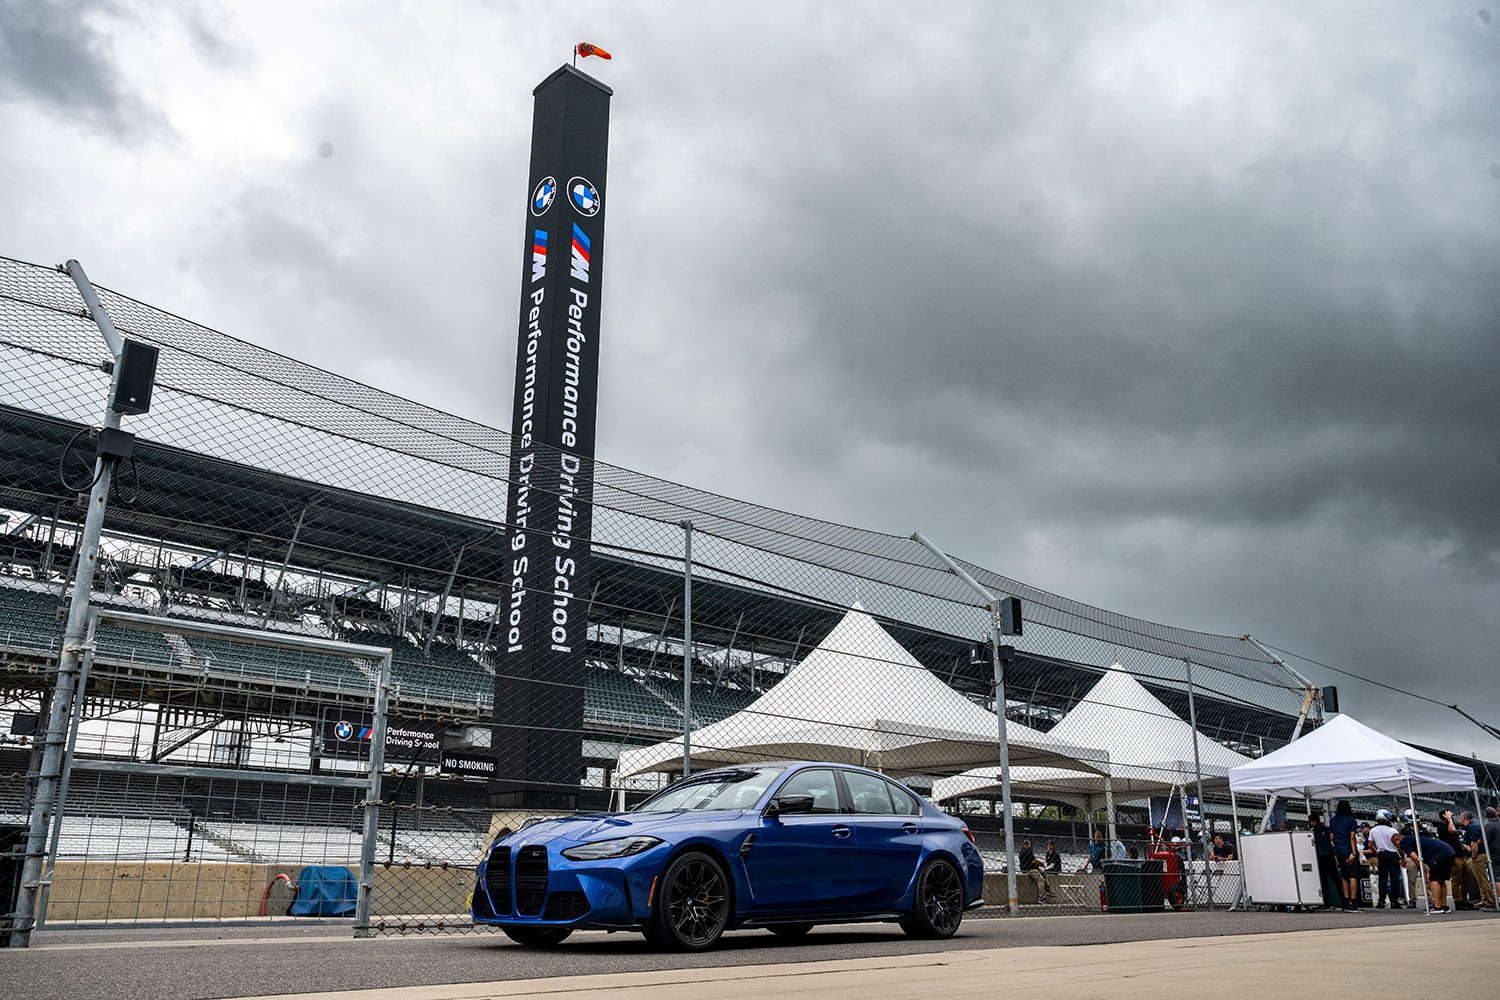
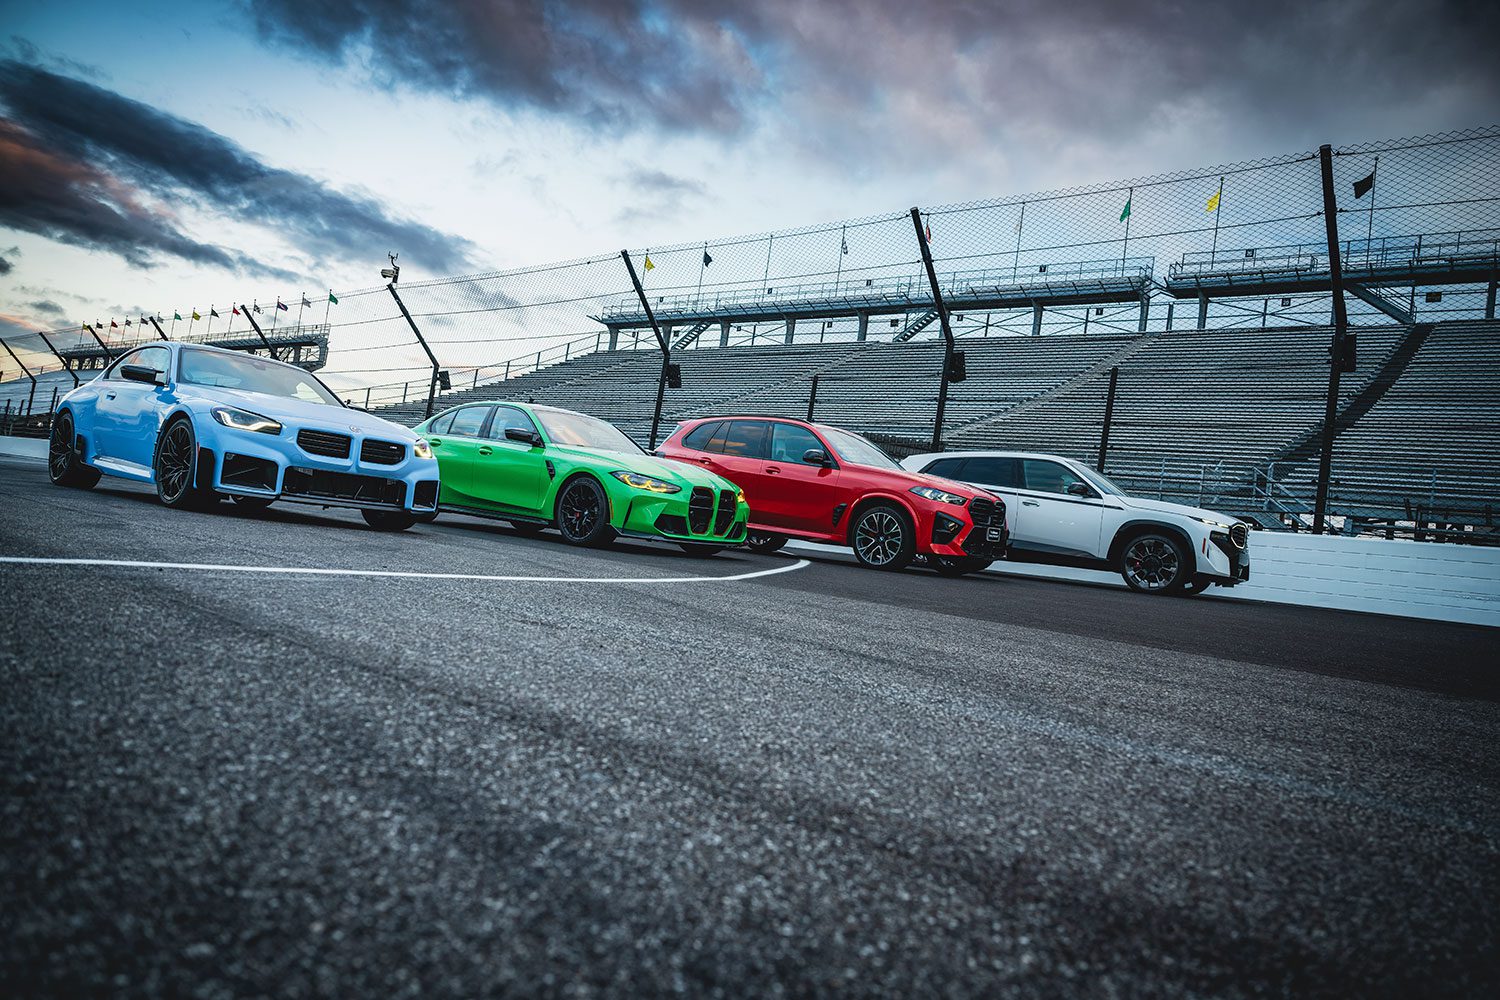
Upon arrival, I immediately forget all of that because I see a display at the entrance to Indy with a bunch of B-sides and one-offs. I’m talking M3 CS, an M2 with every M Performance Part imaginable, even an XM.
“Can I get these for a roller? Add an X5 M in there too perhaps?”
The answer is yes – they then toss me the keys to half-a-million dollars in BMWs.
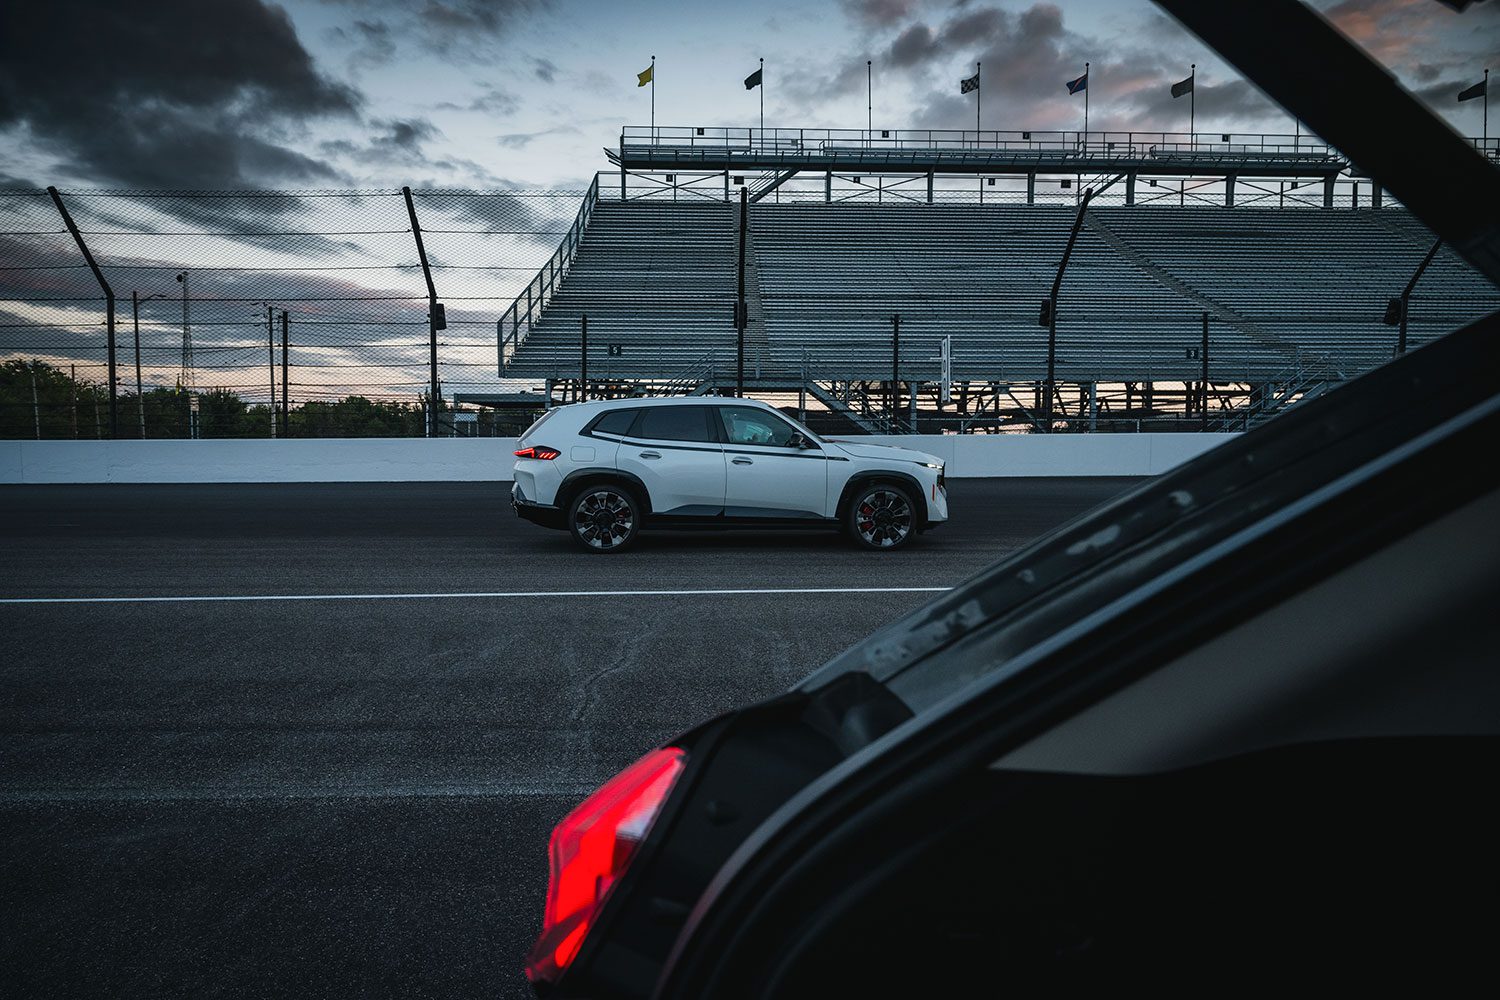
Finding the right location on track for shooting rollers
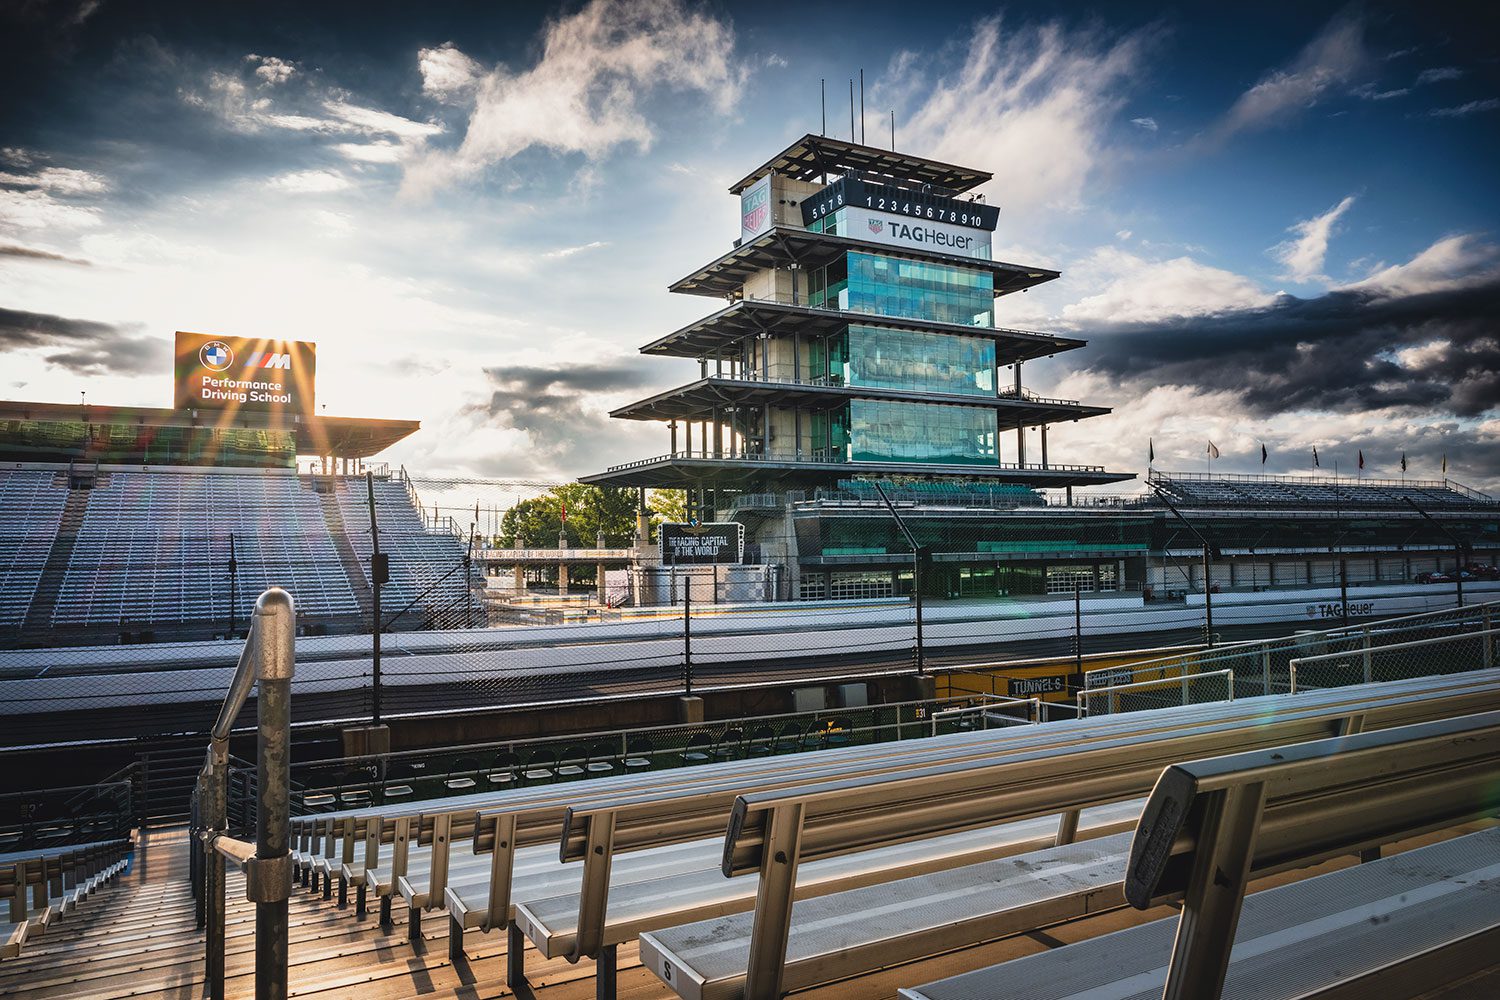
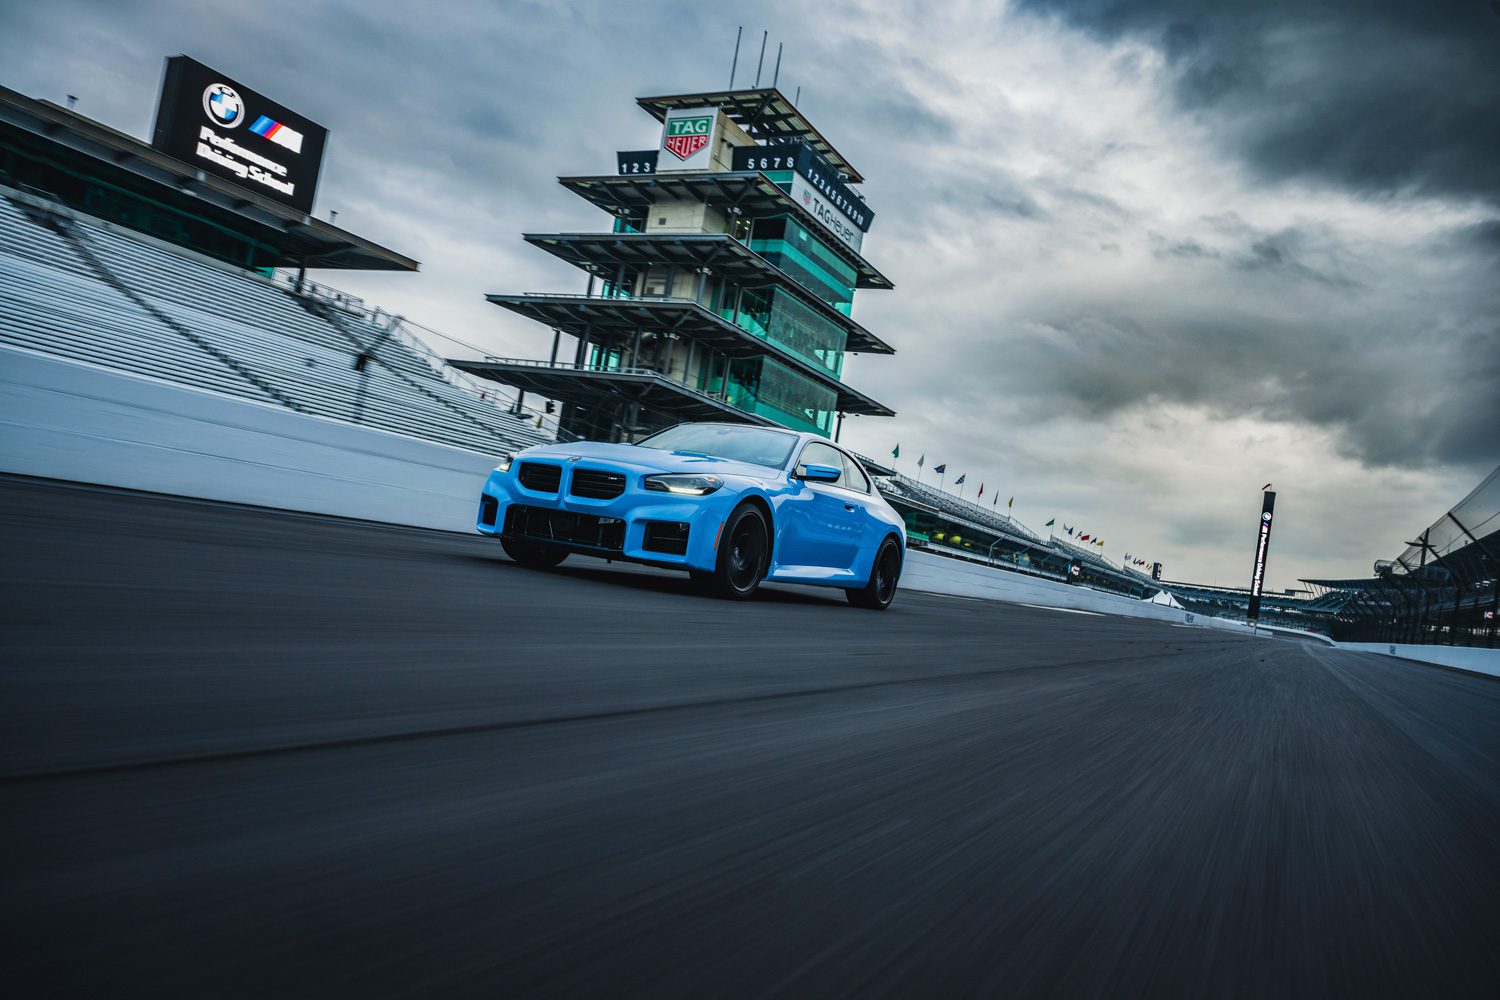
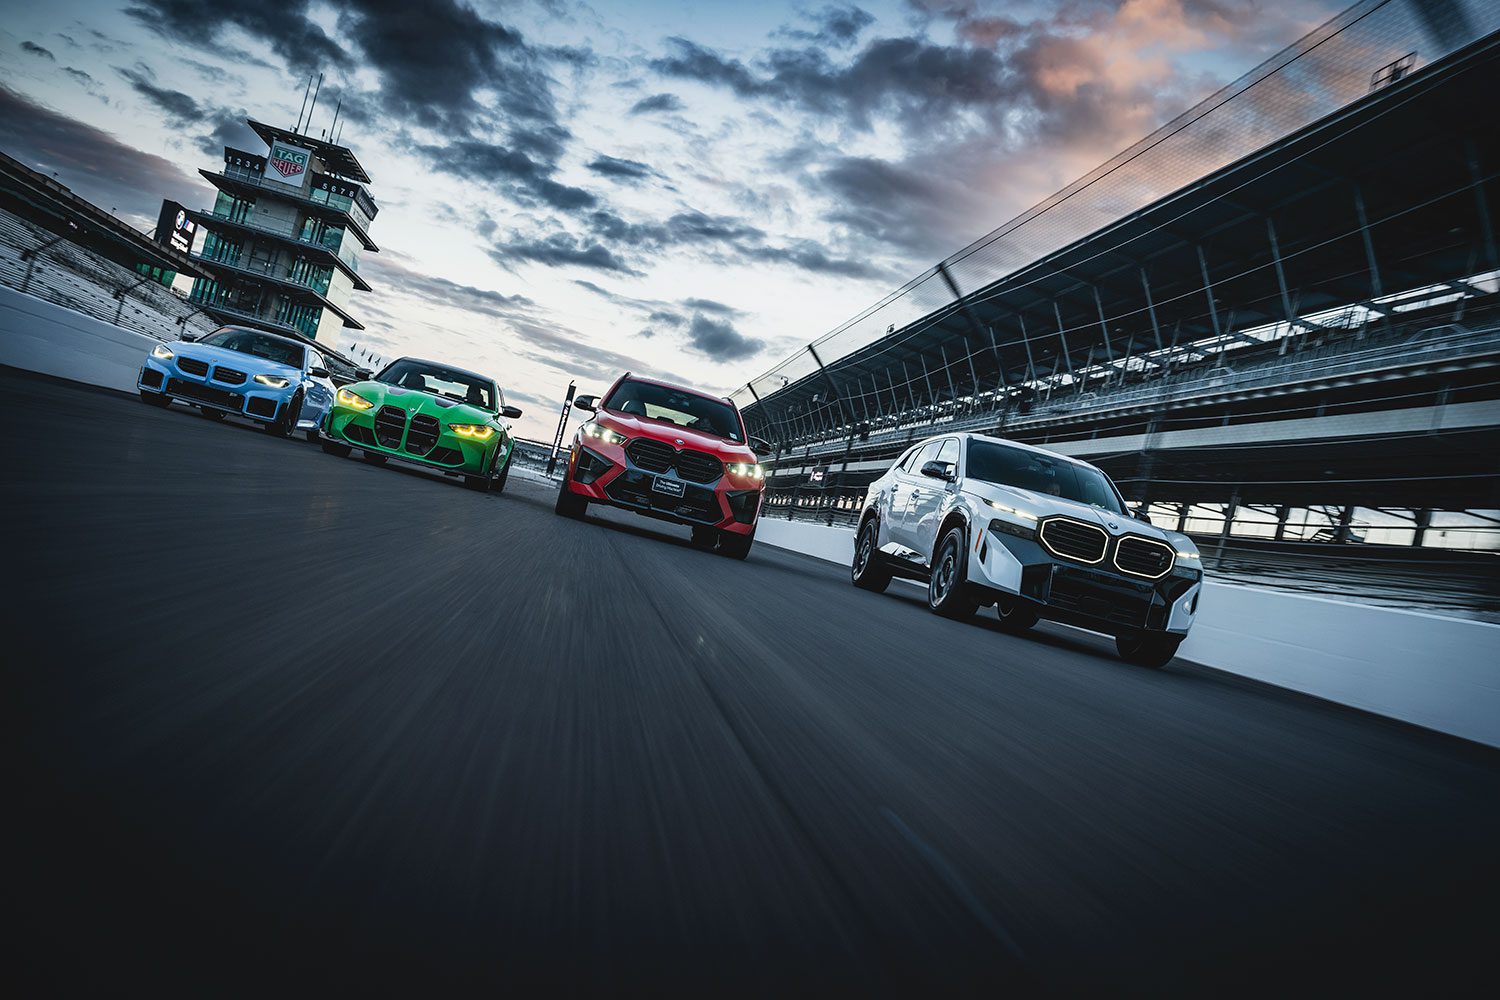
“That’s easy – the tower!”
Yes, the iconic Indy tower along the main straight is what we want, as it’s easily identifiable and looks pretty neat (although not for this main shot).
But there’s more. The Brickyard line and digital screens for the school – can we get those in as well? Not all together – the brick line runs across the Pagoda tower, so I can’t do both in frame.
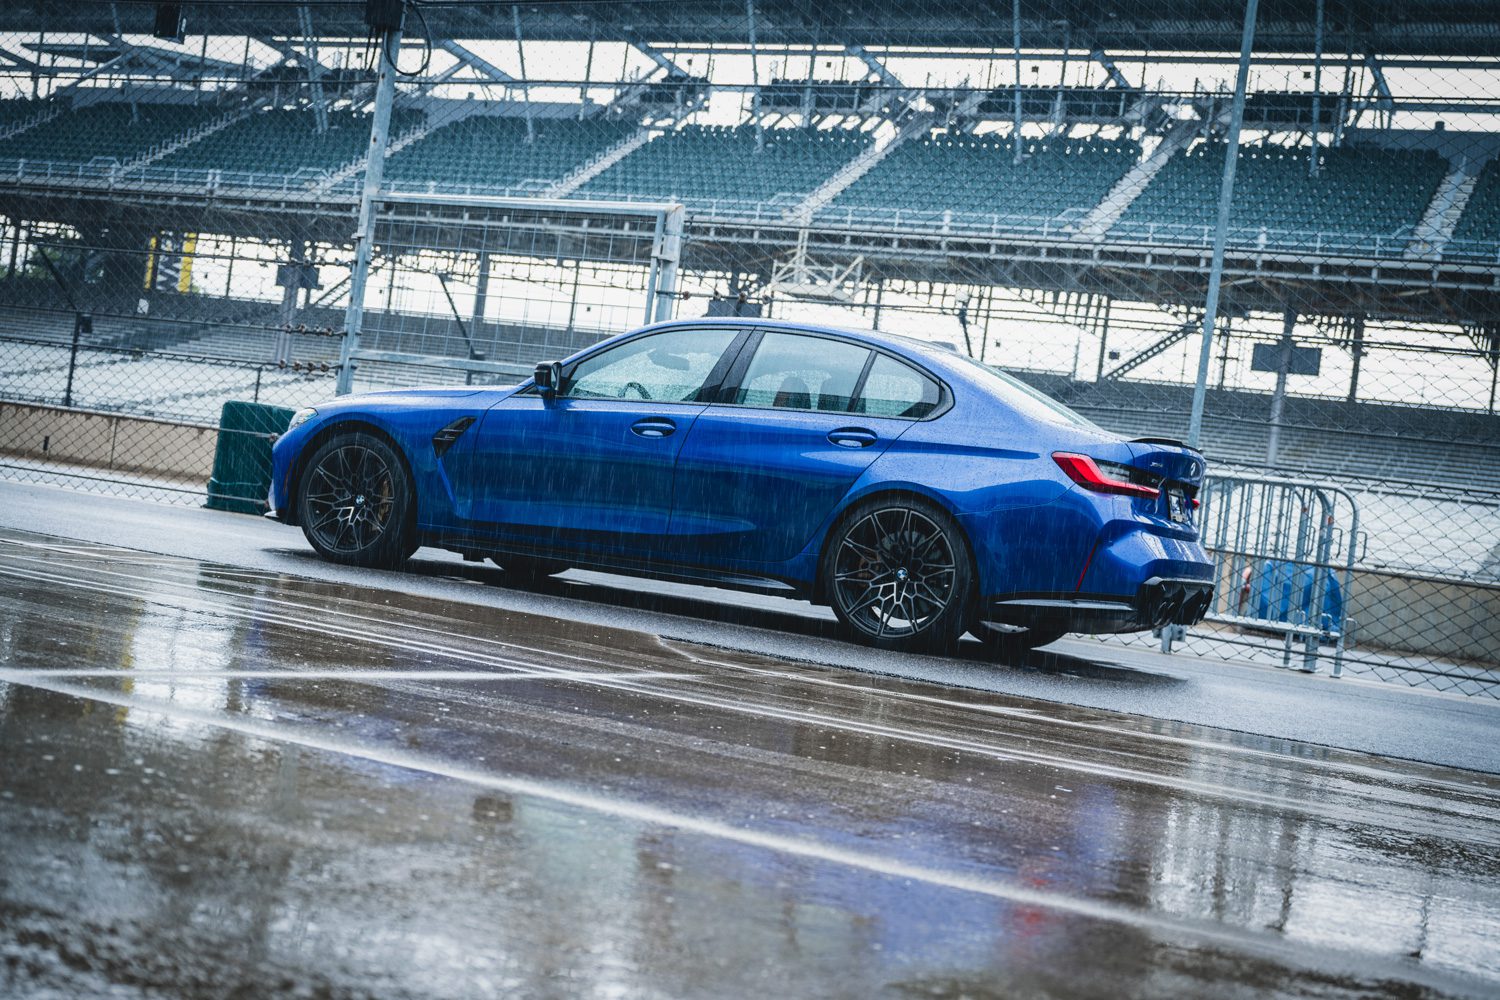
Next, we have to consider lighting – it’s mid-September, and the sun isn’t exactly agreeing with us. It sets early behind the grand stands, and occasional rain provides a constant threat. On the flip side, the clouds here are always beautiful and provide great depth to the image if timed right.
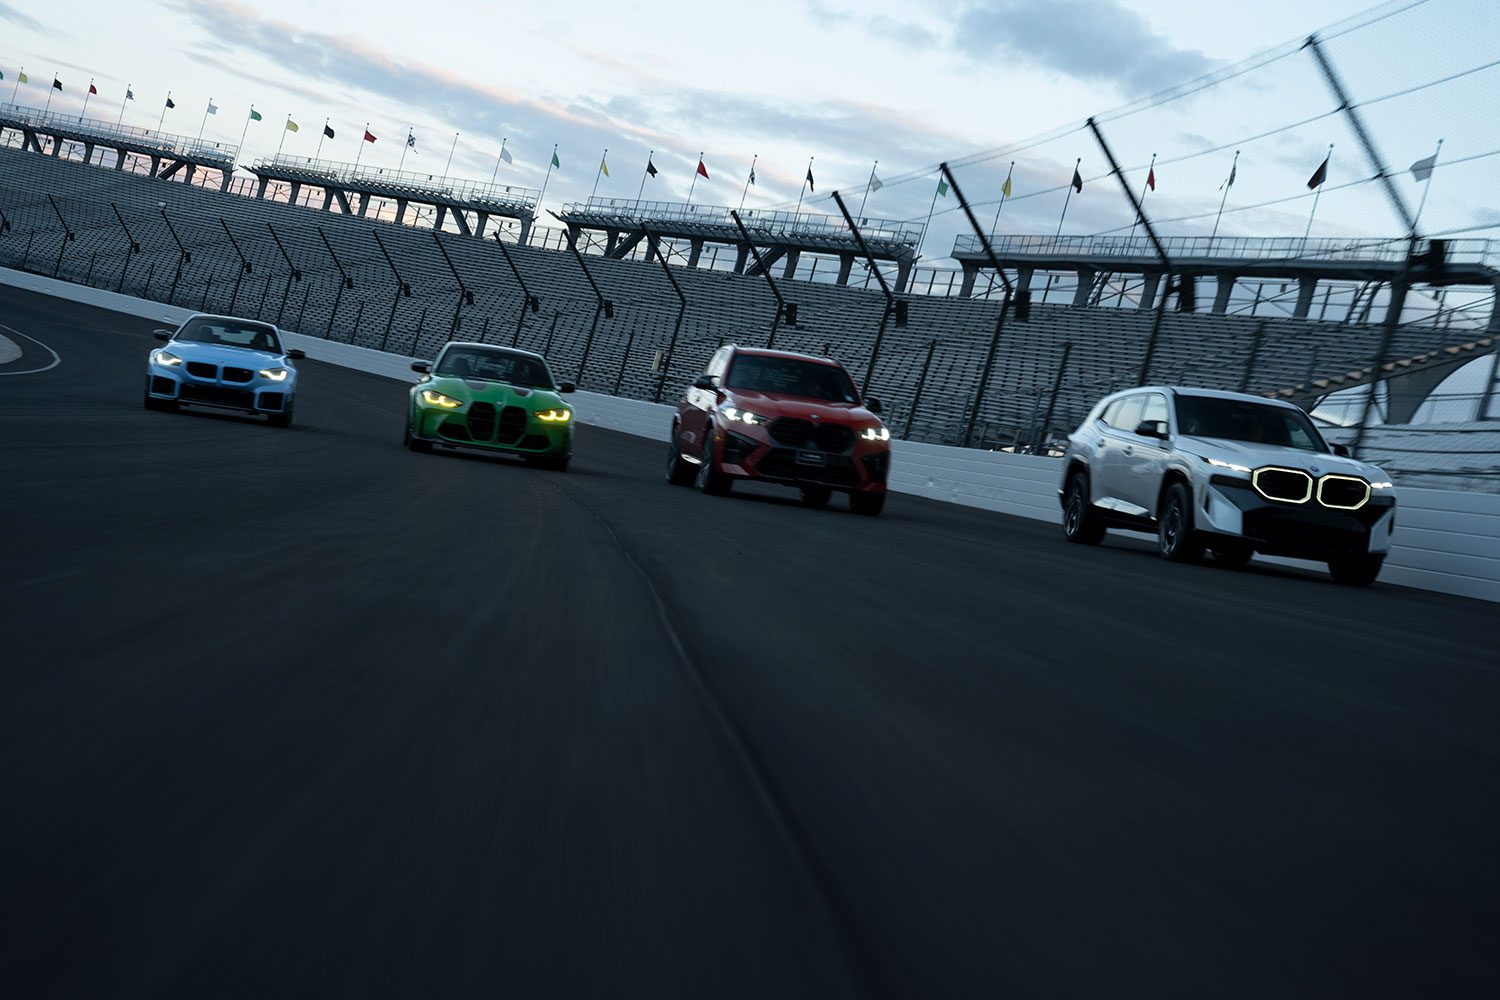
If you hustle the car around the track with a camera car, you can do a lap around in about 3 minutes. But Indy informs us that the speed limit is a hard 35 MPH. At 36, spikes comes out from the asphalt and the day is done.
Not really, but they stress the point enough. Could be worse – I usually shoot rollers around 50 MPH, but can make 10 look like 100. And since we can’t do multiple laps with four cars for our poster shot (we’d run out of lighting), I decide to just use the straightaway.
Can we nail it in one take before the sun dips out?
Camera settings for shooting rollers
I see tons of social media posts either asking what camera setting to use, or “informing” everyone. For the record, this shot is:
- 33 mm focal length
- f/5 aperture
- 1/30 exposure
- Automatic daylight setting
- Manual mode
- ISO 125
Now take all of that and throw it away. I’ve shot rollers at f/9, and f/3.5. The ISO is low because this will be printed large, and noise will become too visible. But I’ve gone as high as ISO 600 for shooting rollers.
The point here is if you have an interest in doing this, please go out and practice with your location and lighting. Sometimes doing panning shots beforehand will help you determine what you need to set your camera on.
And get ready for this, because I have no idea what exposure setting to use. I simply look at the light meter on the camera display, and when it’s just slightly on the “over” line, I know I’m good. If the shutter is open too long, the shot will be shaky, so finding the right balance between all three settings is key.
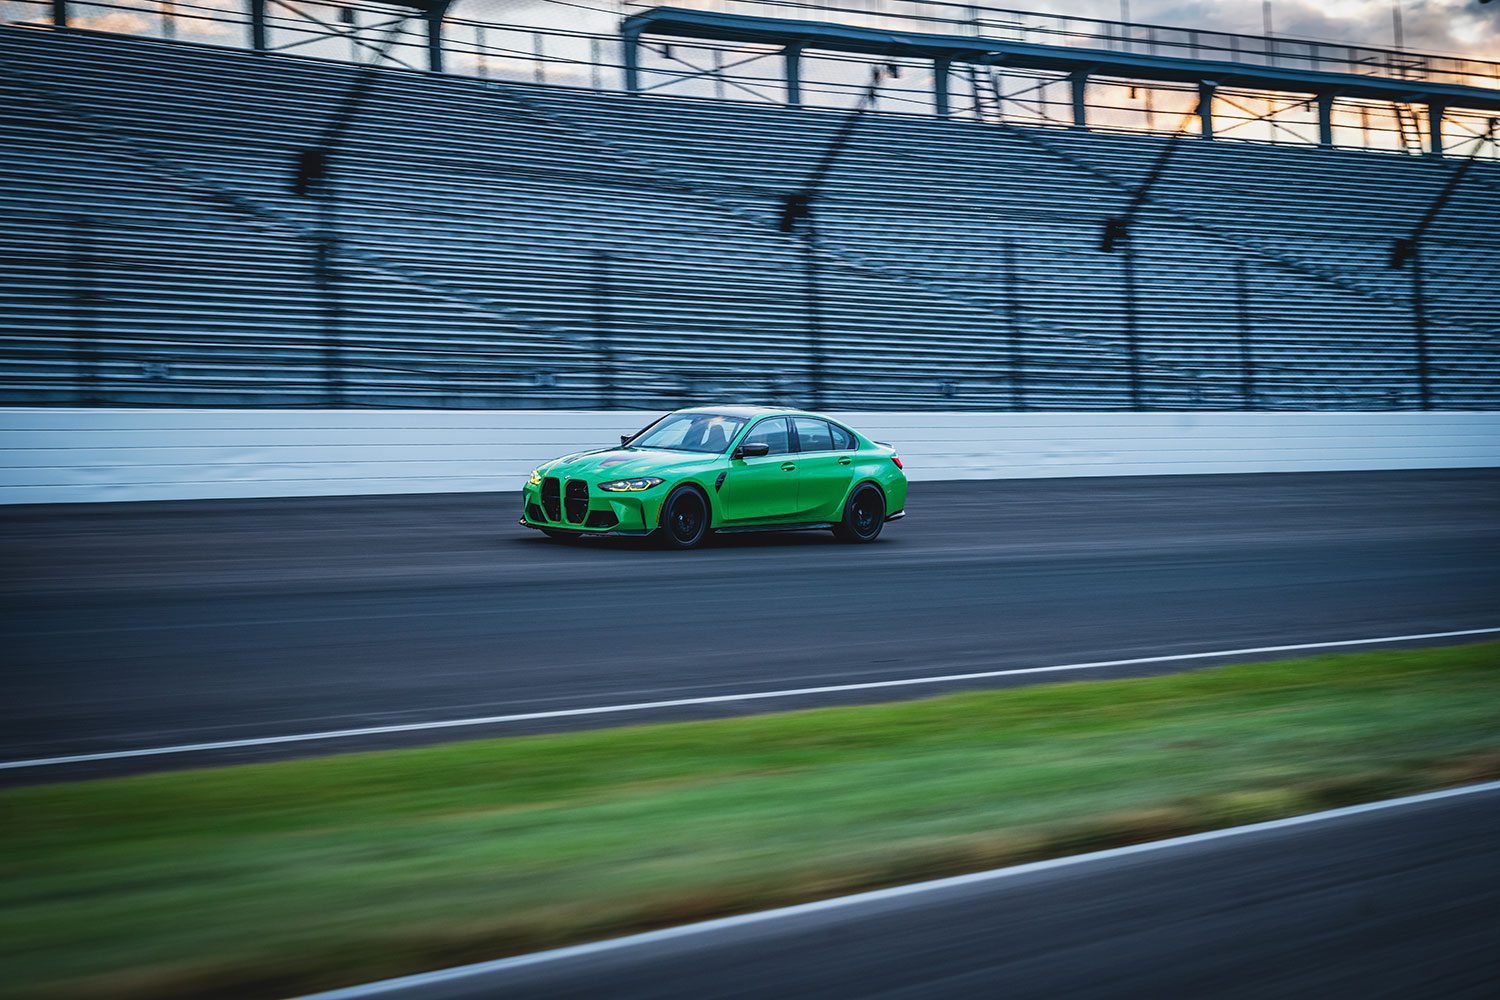
Speaking of, I’ll keep aperture on 5 or above here because we have multiple cars staggered and we don’t want the M2 to fall out of focus.
Taking the shot
To make this happen, we need:
- The four cars cleaned
- Four instructors to drive the cars
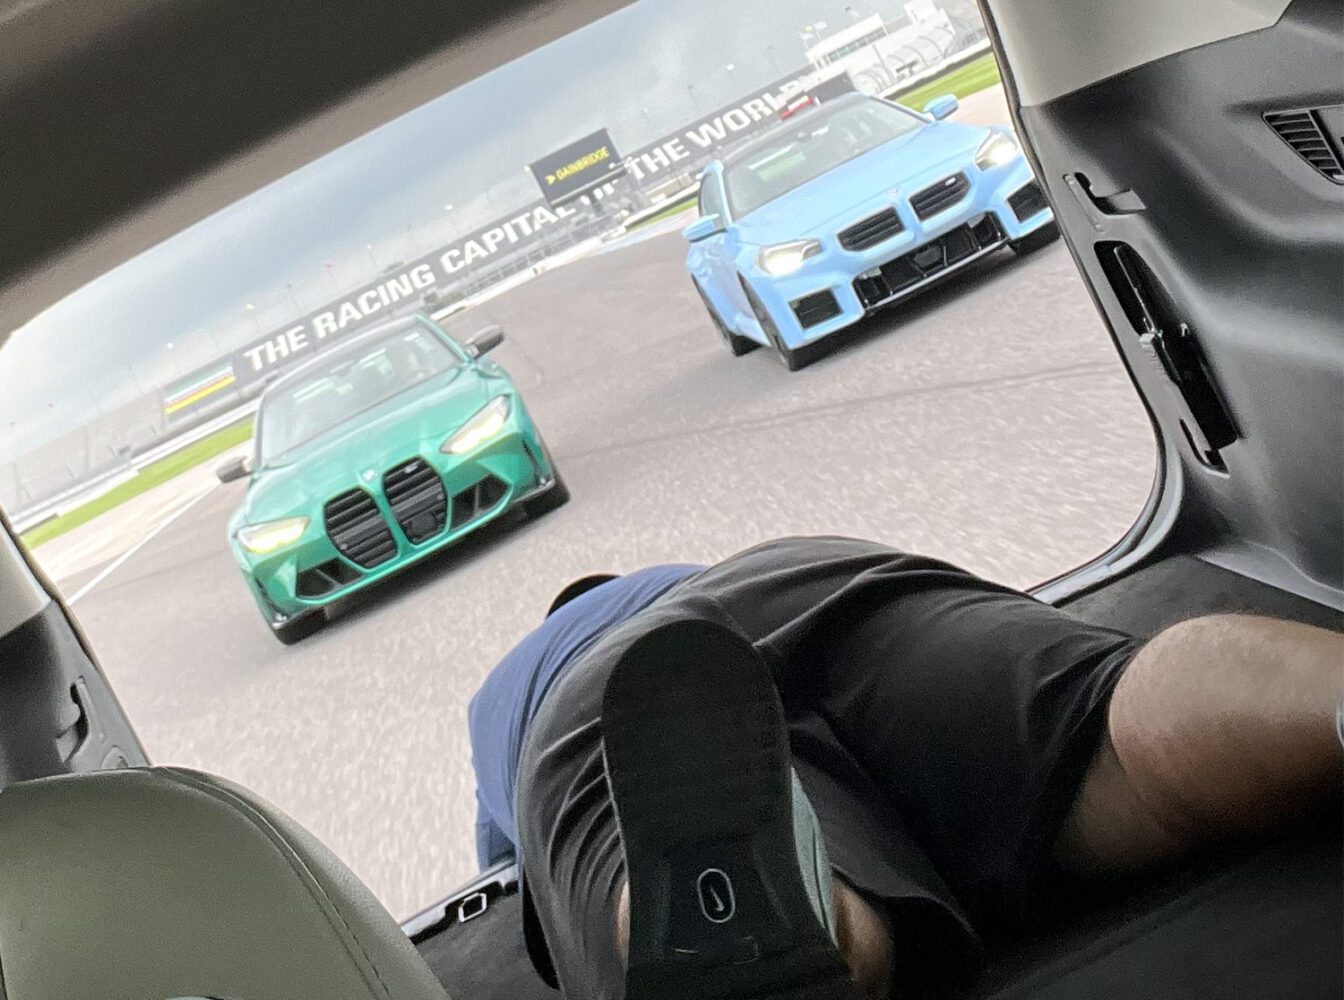
- A camera car, in this case a trusty Ford Edge.
- A driver of said camera car. That’s Brandon Deuster, who is also a photo guy. It’s best to work with other artists here, as they will inherently understand what you’re trying to accomplish with little verbal direction. Also, your life is in their hands.
- Videographer Anthony Purcell, who I’ve shot with multiple times before. He’ll be capturing rolling footage.
- The track to be cold and clear
- Walkie-talkies (sometimes hand signals) to communicate.
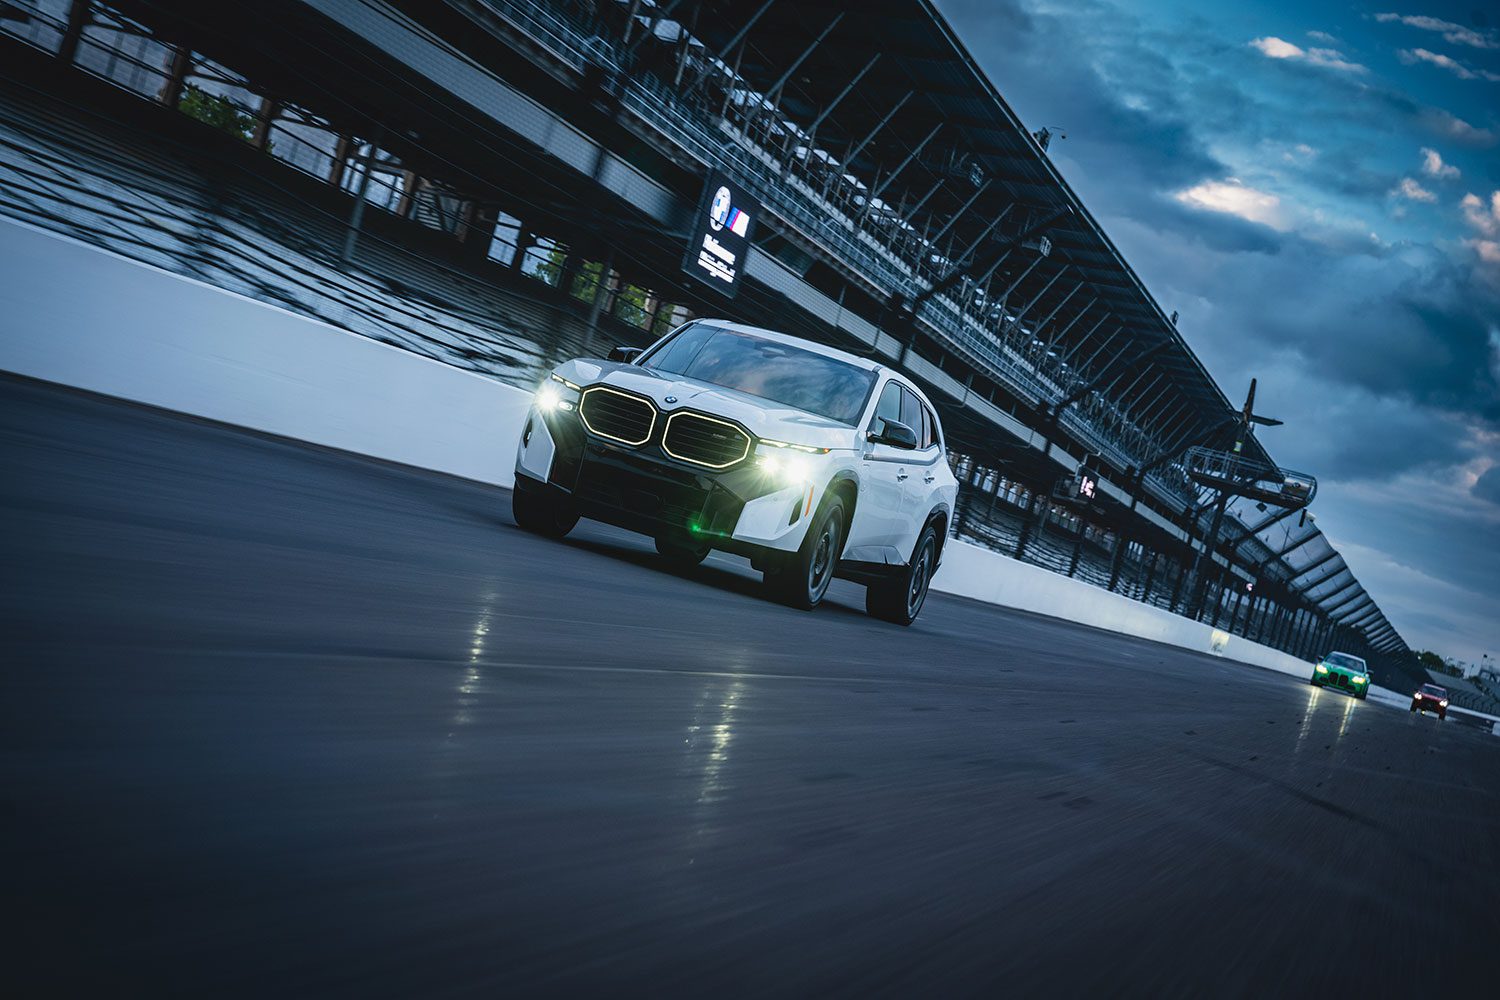
- Check to ensure the headlines are off, but the DRLs remain on.
I have the cars line up from smallest to largest, and want the XM closest. Once we start, it’s on the drivers to maintain that staggered line.
After all that, it’s action. I hold the camera about 6-8 inches off the ground, and use a wrist strap to secure it. One thing I never use is “burst” mode. Instead, I let the camera focus after each shot. That means instead of 50 shots, I have 25, but more usable ones.
I also try and go as wide as I can, capturing plenty of foreground. Framing it this way matters more when you have a single car , because you can zoom in more – I like to leave a a lot of breathing space for magazine ad copy.
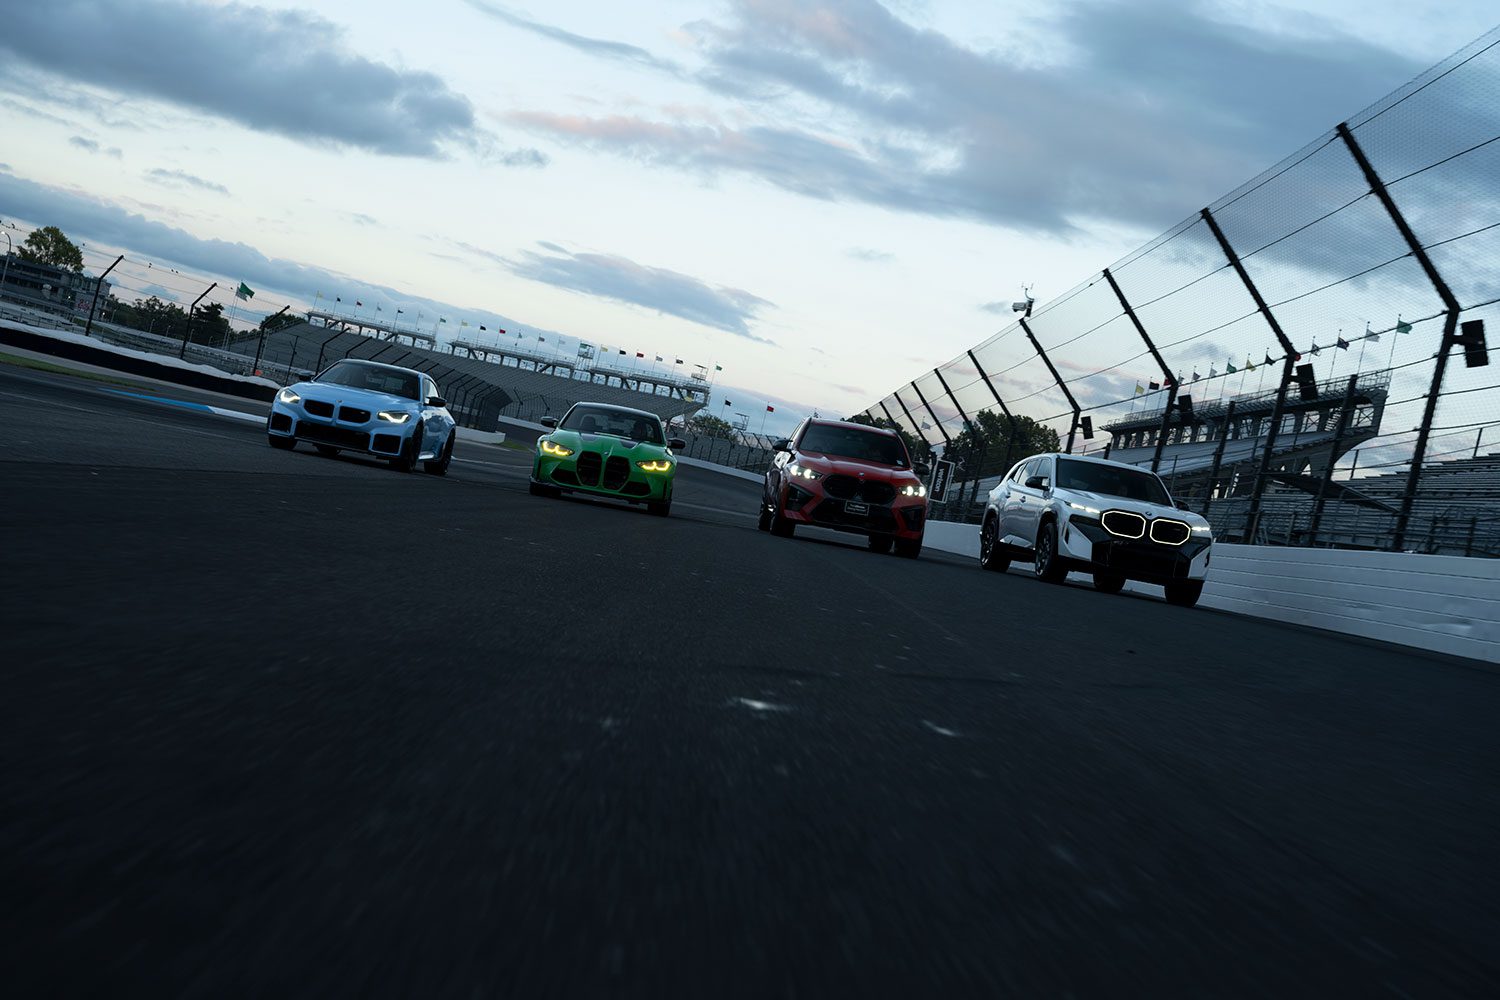

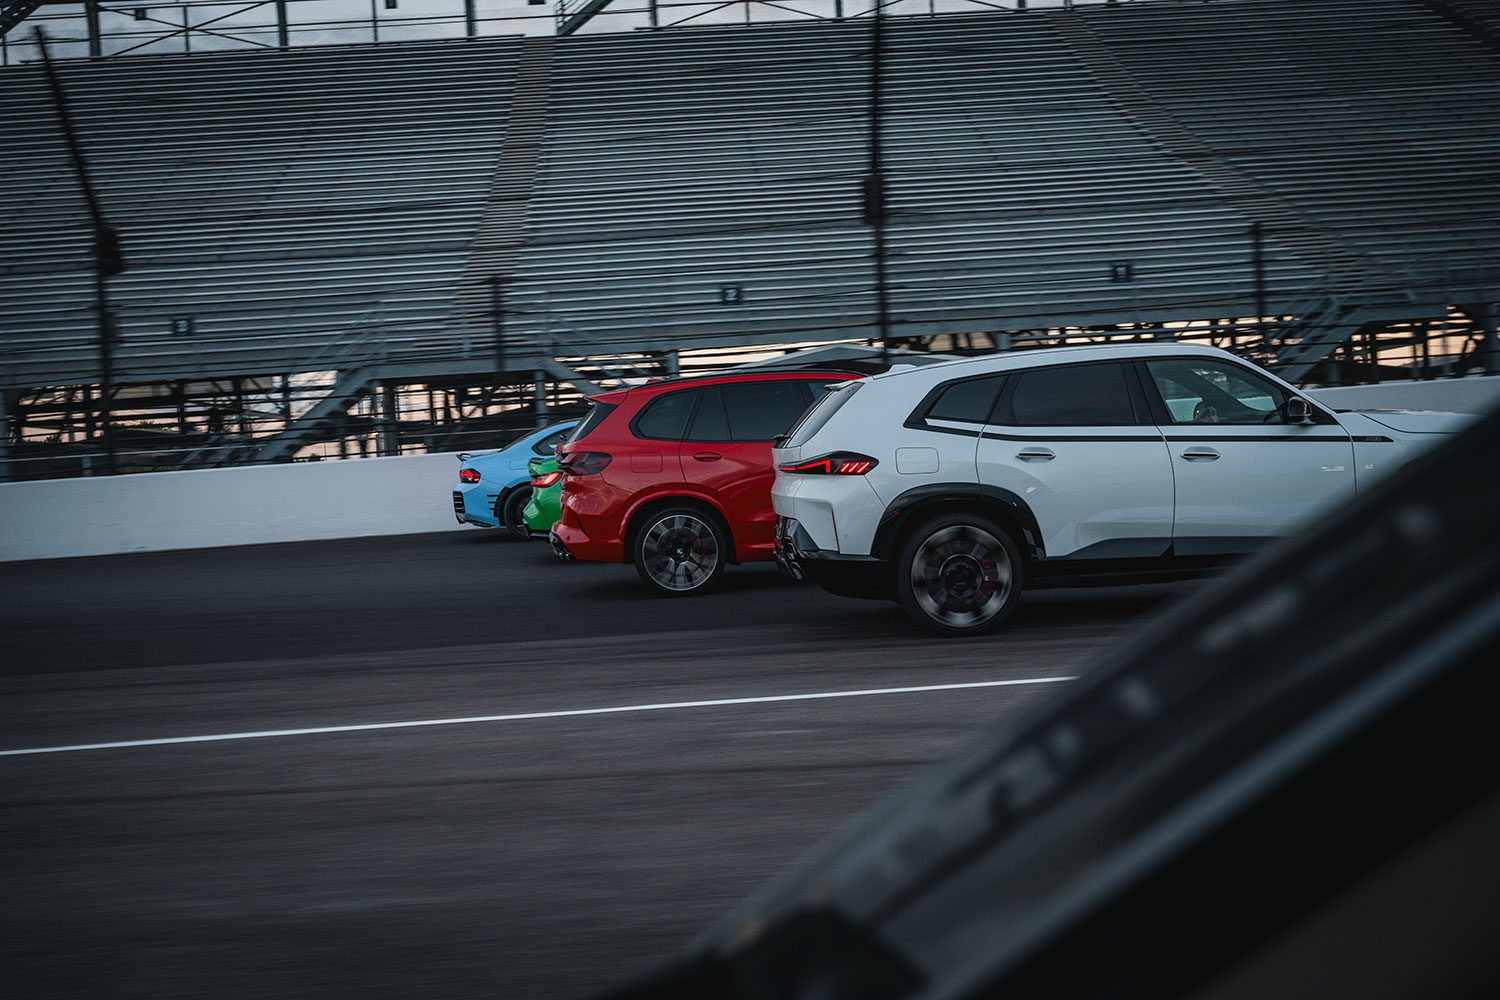
It’s important to do this at sunset (or sunrise) because of the even lighting. Since the sun has already set behind the grand stands here, it works well to avoid having the cars throw long, distracting shadows. Sometimes, I’ll tilt the camera to give the cars an aggressive slant (sometimes I tilt the camera too much).
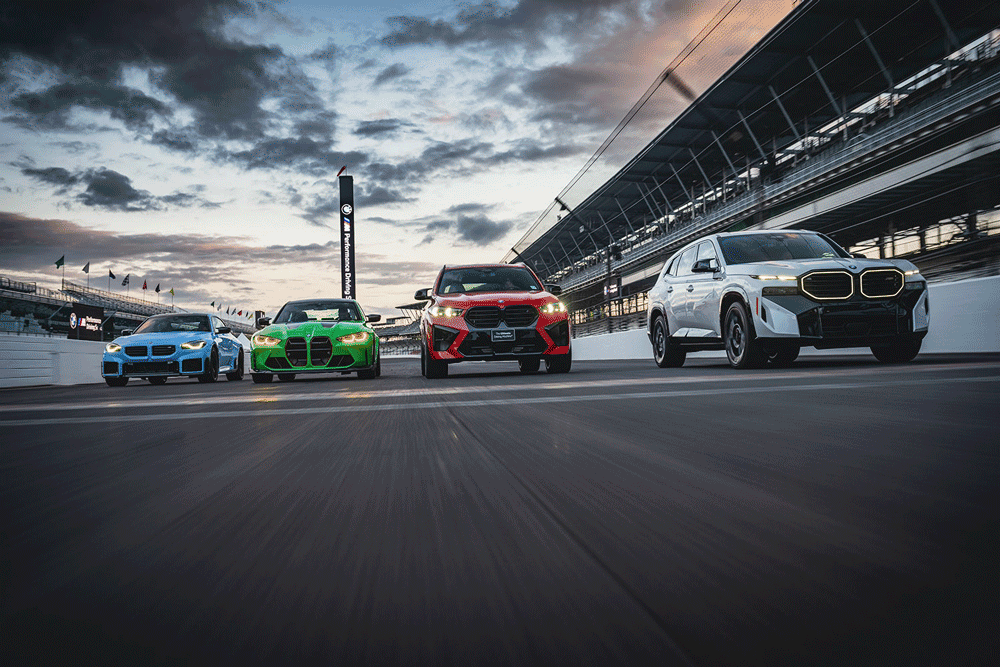
Here’s the result.

Editing in post production
Another area of contention. I don’t use presets, because every photo is different, although once I retouch one photo from a set, the rest are usually edited in the same manor.
I’m afraid the magnitude of the shot is lost online – it’s big, over 8,000 pixels wide. Cameras don’t usually matter – any modern digital camera can take this shot. But the Z7 continues to be one of the largest resolution mirrorless cameras on the market, so it’s holding up well. A medium format camera would have a very hard time focusing on this roller shot.
One thing I did want to show you is how AI has made my job much easier. With one click, I can remove just about any object, or add something from Photoshop’s library. Let’s say I wanted to remove the M2…
Photoshop does it all without me having to brush in anything else. With a little work, I can make it totally seamless.
All my rollers are produced in this fashion.
Many of you email me with photography questions, so even though it’s rare for me to post a how-to, know that I will do my best to answer you personally.
Finally, my last roller tip? Please be safe, be aware, and use a crew you trust. Oh, and have fun!
Thanks to the BMW Performance Driving School, RITTA, The Indianapolis Motor Speedway and Halycon!
Automotive roller shooting tips
- Varying speeds, lighting and environment mean your camera settings will always change
- Try to shoot as wide as possible in most cases
- Keeping the cars above 30 MPH will make your blur more intense with less shutter time open
- A zoom lens is best, usually 24-70mm
- Shoot with a polarizer to minimize reflections
- Early morning sunrise or sunset will give everything a nice even light
- Safety first – know your limits and the limits of those you’re working with
- Have fun!
Want your car reviewed?
If you live in the tri-state area and want me to check it out, send me an email!
Support the cause
Commissions may be received for product links on this site. Help out if you can.
I use Nikon camera bodies and lenses, a Westcott Ice Light 2, Manfrotto tripod, B + W filters and an iMac Pro to make the art you see here.
Follow along on Instagram @machineswithsouls
One thought on “How to shoot rollers the right way”