
If you’re a regular reader, you’re aware that Photoshop is my go-to for post-production on images. That’s still true, but I recently came across a program that’s specific to the automotive photography realm: VirtualRig Studio.
What VirtualRig Studio is for
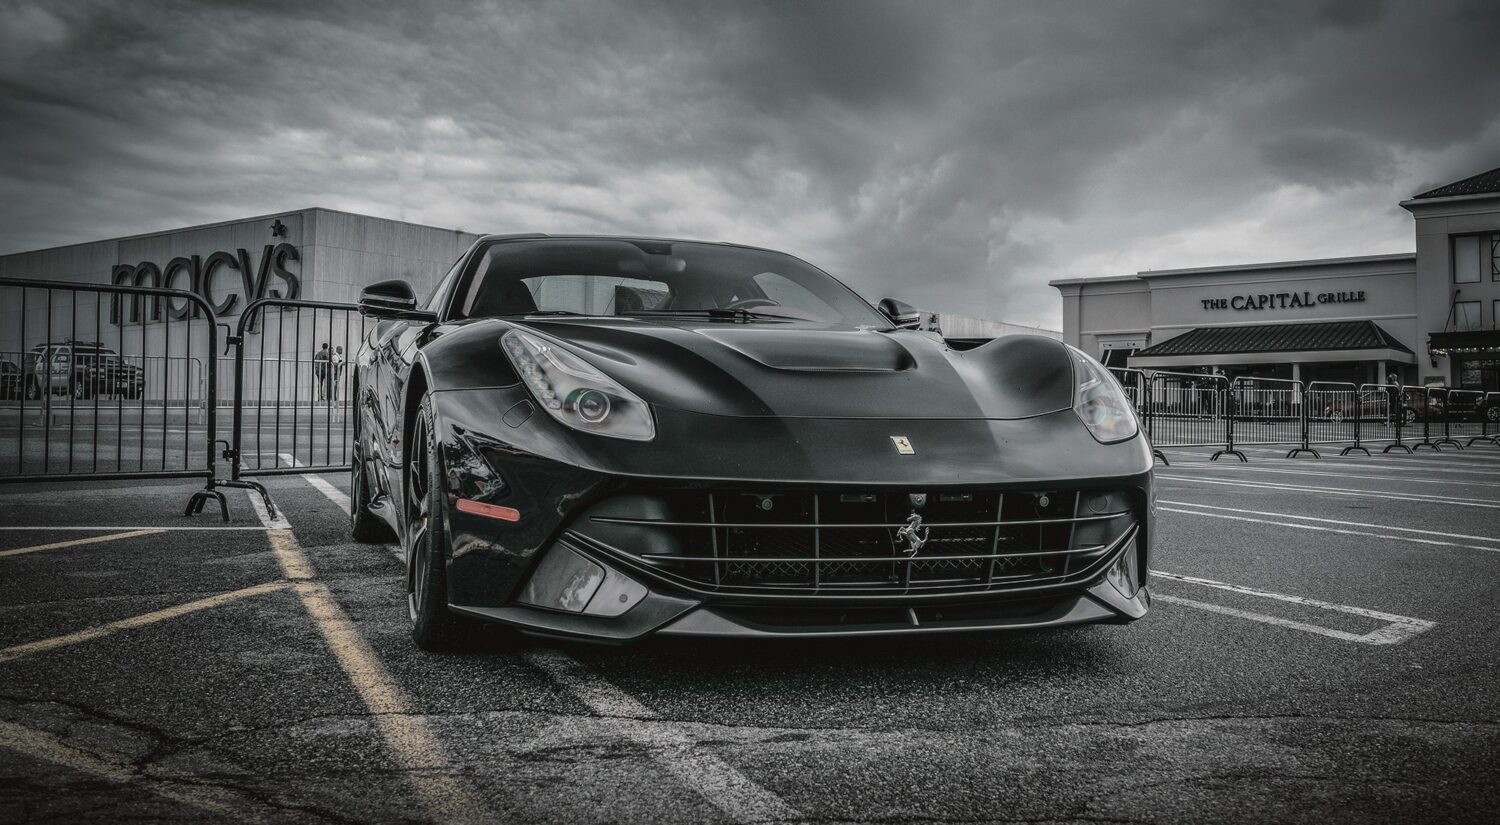
If you’ve ever seen a professional image of a car in motion used in an ad campaign, you may have noticed how sharp the car looks as compared to the rest of the image. It’s impossible to get the entire car sharp in the real world – your camera can’t pull the entire car out of the background, usually only the front or back depending on your focus. Observe.
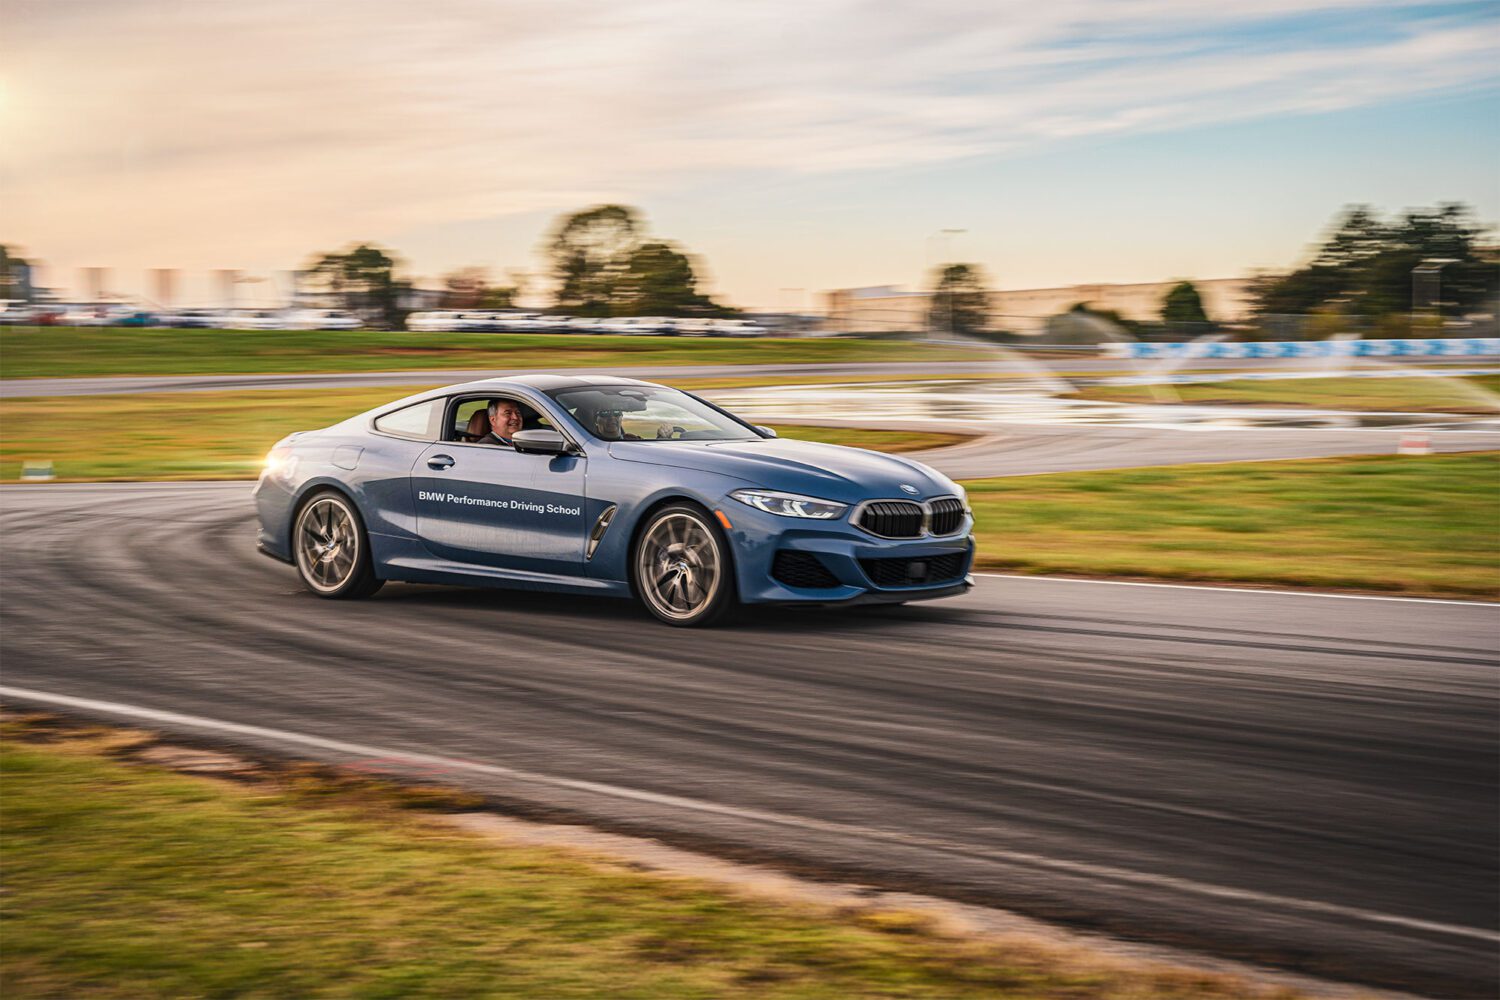
The back half of the car is soft. That’s ok, but what if you want the entire car to be sharp? You can do it 2 ways: with a rig that costs thousands of dollars with multiple grip guys to help set up, or you can use VR (VirtualRig). It’ll be the best $50 bucks you’ll ever spend in regards to automotive images.
What about Photoshop?
We’ll still use it in this tutorial, but I find the blur gallery just isn’t very user friendly, takes a long time to render no matter the machine you’re on, and the results are not always realistic. VR solves all these issues and is very easy to use.
Planning the shoot
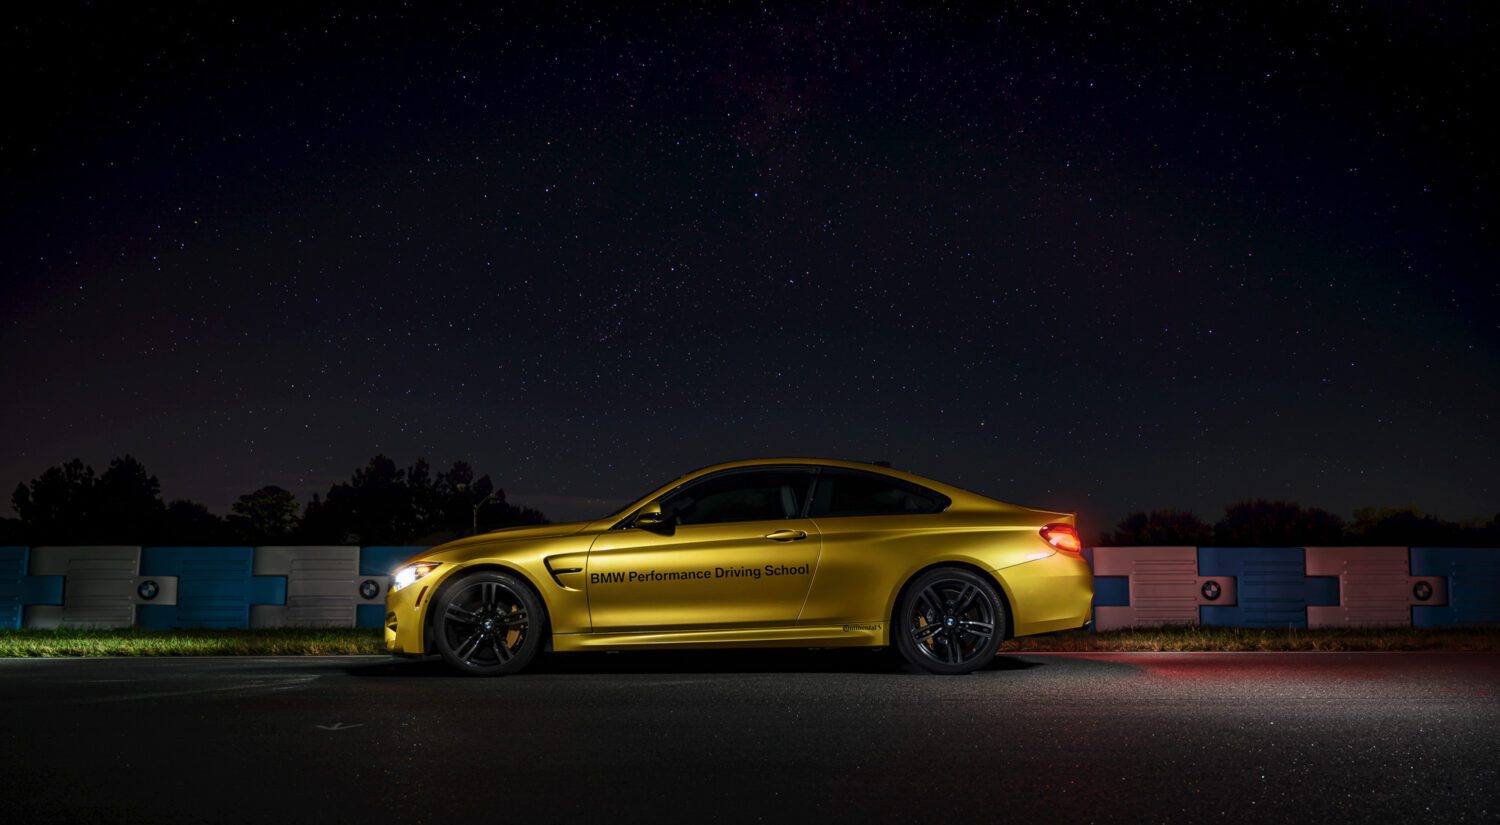
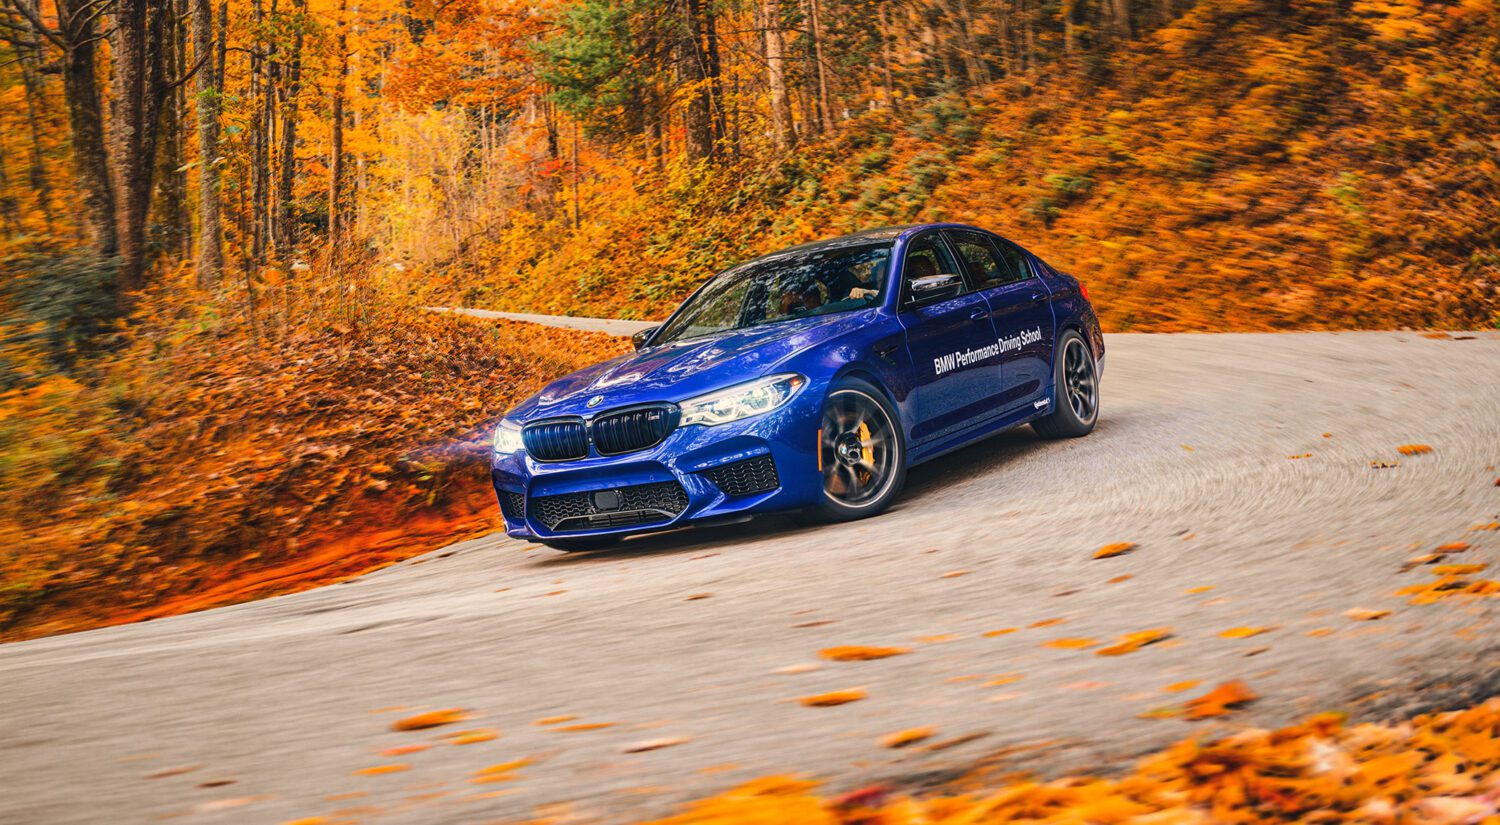
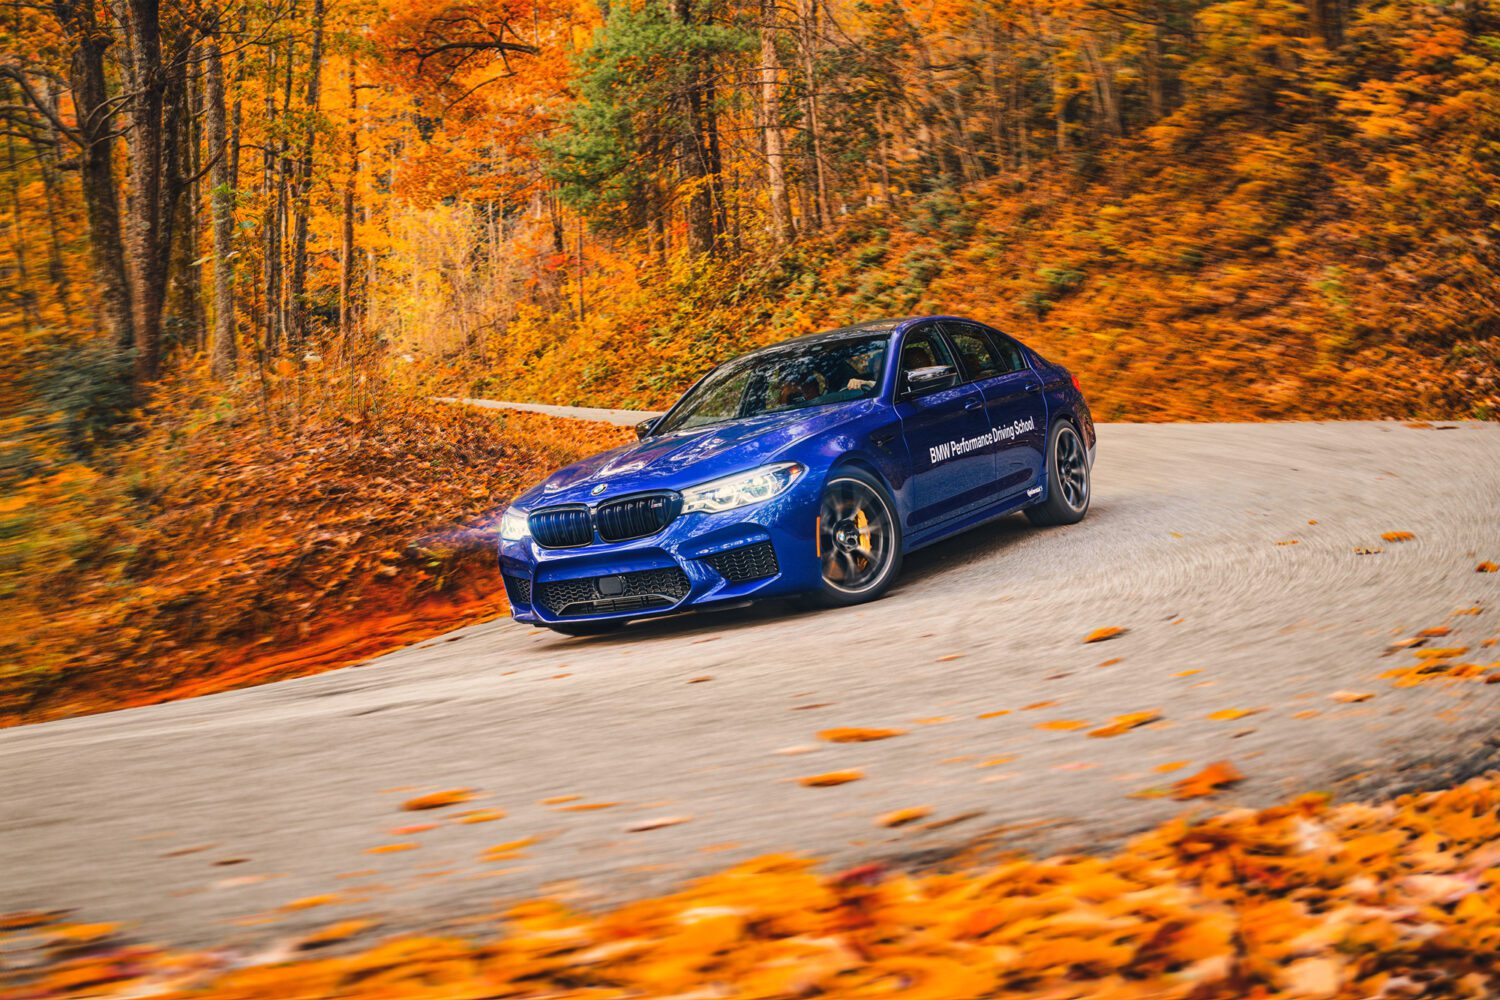
Before we get to the post-production part, we’ll have to shoot the scene in a specific way, using a recent image from a shoot at the BMW Performance Center as an example. I found the location via Google Maps, located in the Blue Ridge Mountains in North Carolina. The curvy shape of the road was the perfect basis for the image we’re going to shoot.
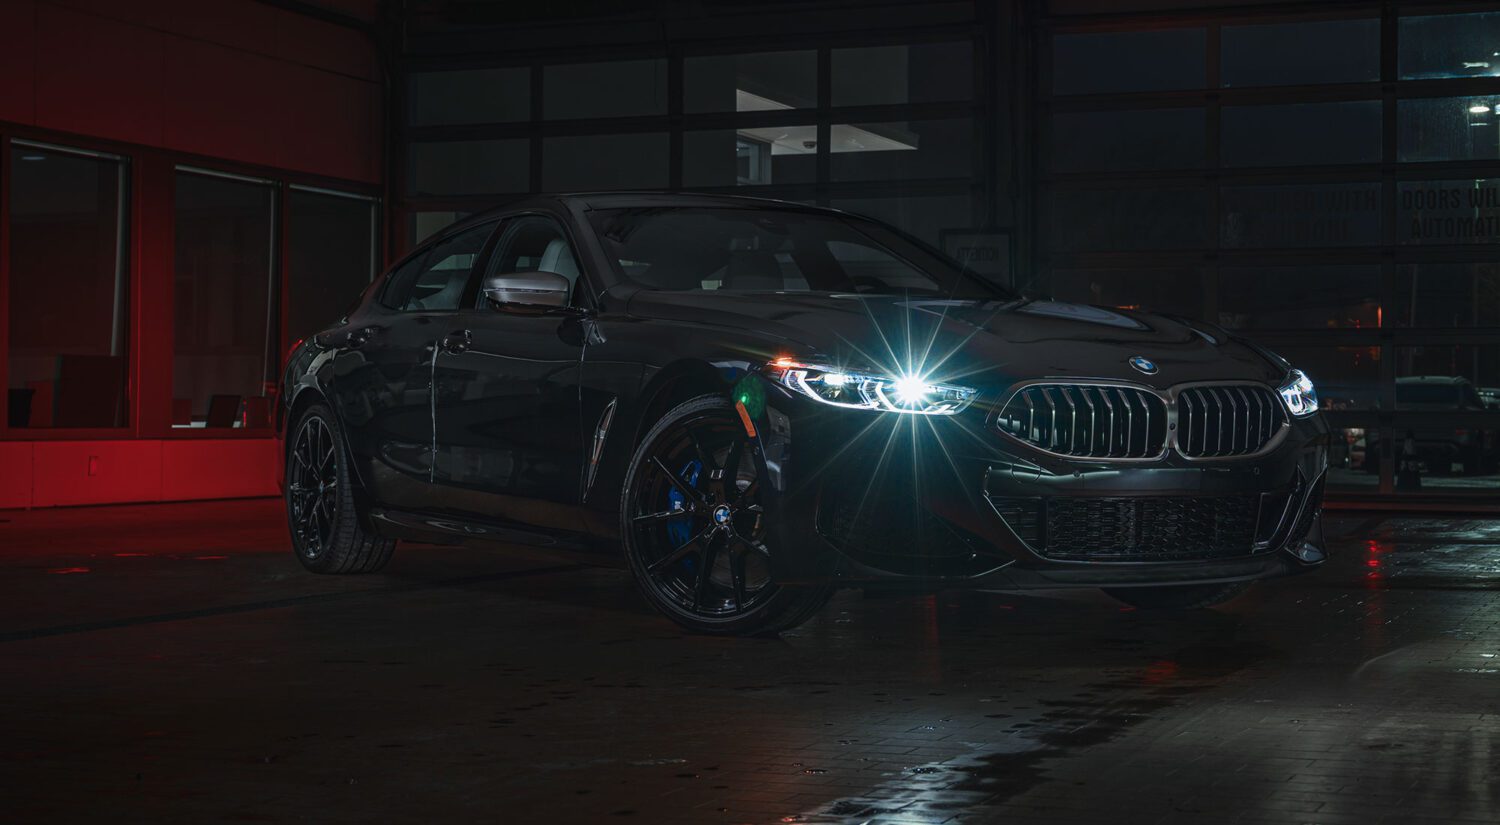
First, set up your camera in the location you want with a tripod, and have the car in the scene. Shoot with a polarizer as you normally would and get all the different reflections of the car as needed. Make sure the entire car is sharp, and don’t worry so much about the background. Camera settings used:
- Aperture: f/4
- Focal length: 35mm
- ISO: 125
- Exposure: 0.6 seconds
Take an exposure for the headlights as well, since they will require a much shorter time to properly expose the details from the rest of the car.
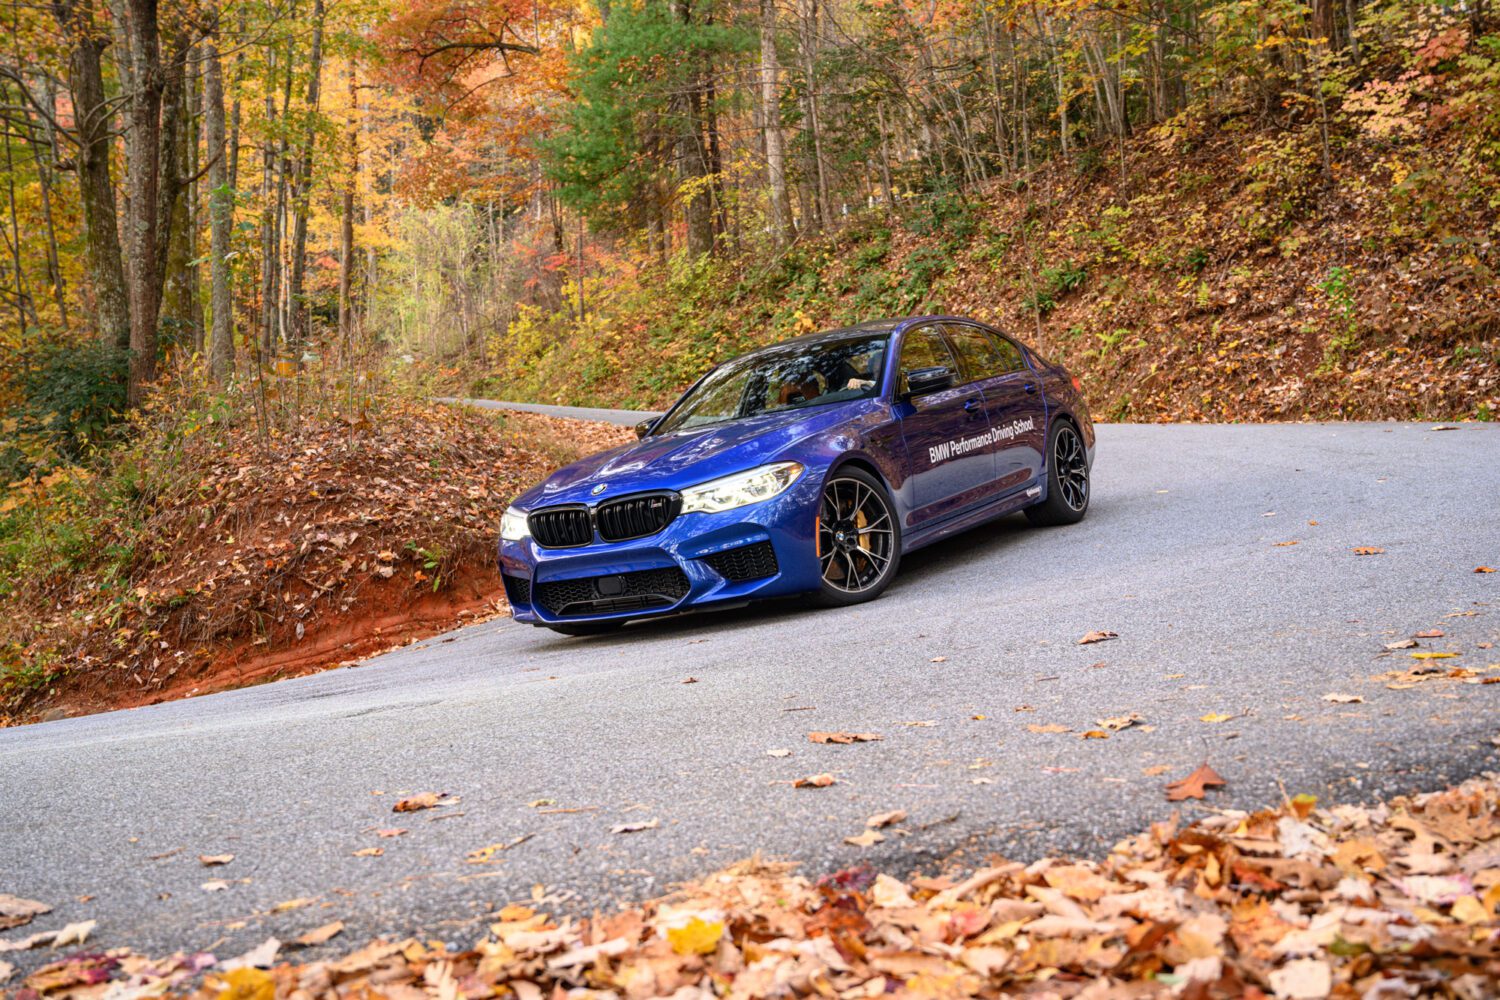
Then move the car out of the frame, and shoot a few back plate images. It’s crucial to get the background without the car so that it’s easier to blur it in VR, but you can use an image with a car in it in an emergency.

We’ve got a nice background, and some images for a nicely layered car. Time to move on to retouching.
Using VirtualRig studio
Take your back plate image and retouch it in Photoshop as you normally would with Camera Raw. Nothing major here, just boost the saturation, clarity, etc.
Save that image out at 3000 x 2000 pixels, because the “Lite” version of the program limits you to that size. If you opt for the full pro version (as of this writing, $999), then you’ll have more options, but this size should cover you for most uses.
For a full tutorial of the program, see their website, but for the purpose of this work, open your image and use the vector arrow tool. Now what’s cool about this is you can add as many vector lines as you like, with different speeds, to make the image as real as possible. We’re showing the M5 coming around the corner, and the closer the object is to the camera, the more blur there will be. Pulling on the dots in each vector line adjusts the blur speed. The furthest arrow is the shortest and “slowest”, because it’s the farthest away.
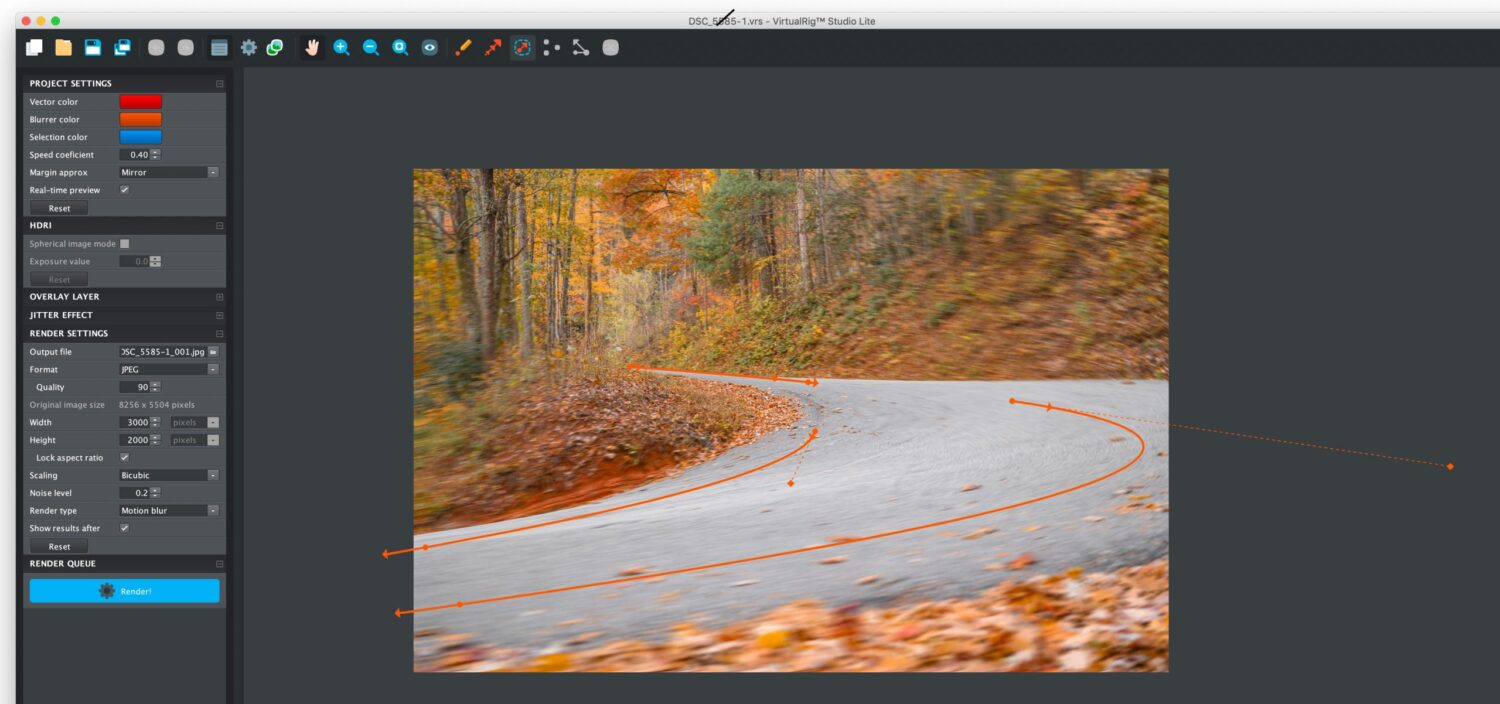
You can also curve the vector lines around turns, and that helps the illusion even more. You can start to see the flexibility you have with motion blur now as compared to Photoshop.
Bringing it back to Photoshop
Now that the image is blurred, we can bring the car into it. Open your images of the M5 and combine them as you normally would. Once you’re happy with that retouching, resize the Photoshop file to 3000×2000 so that it matches up correctly with the background, then add a mask to your car and paint out the background, including the shadow.
Two important lessons here. First, the shadow of the car must look correct and not “placed” in, and we can do that by duplicating the layer of the car and setting the blend mode to “Darken”. That will turn the car translucent but keep the shadow in place. Turn the car layer above on and you’ll have the correct effect.
The second lesson is blurring the wheels. Here you can use the blur gallery in Photoshop and turn on the “Radial Blur” filter.
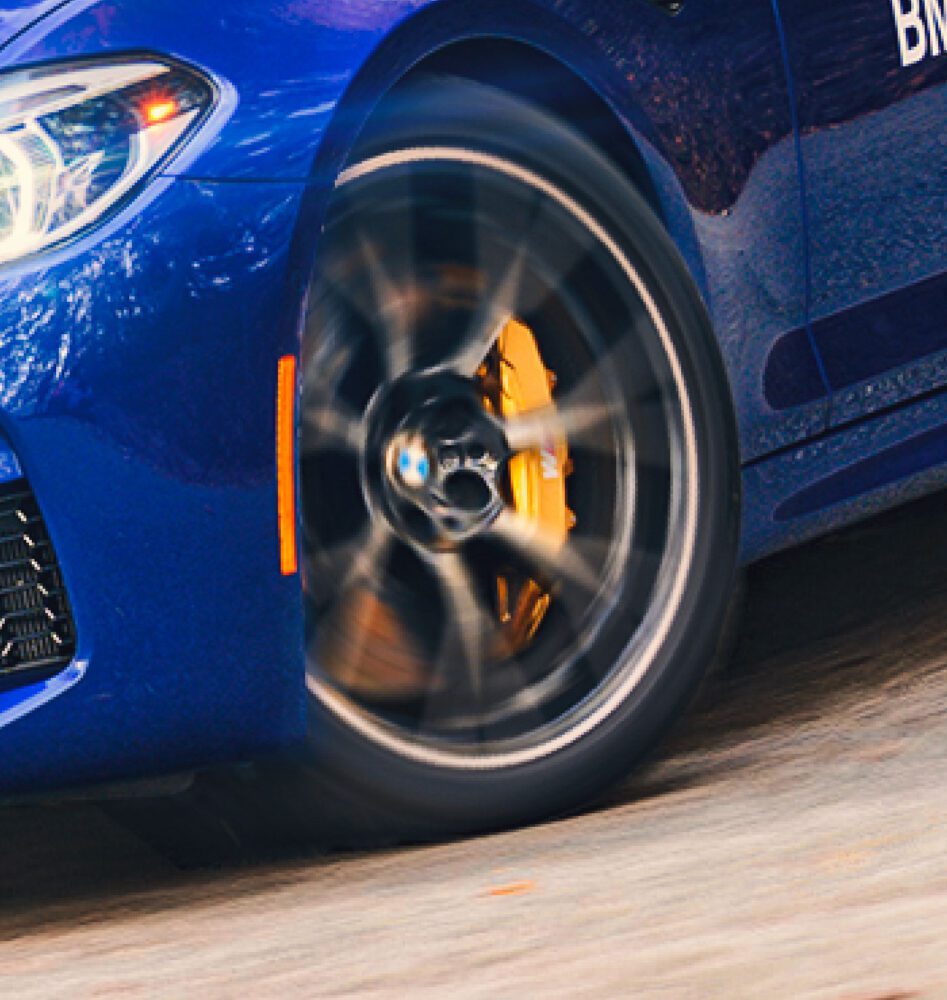
Hit OK when done (might take a minute to render) – but pay attention to the brake calipers. Remember that the wheel and brake disc rotate, but the caliper is static. Mask that part out to bring back the original caliper from the layer underneath.
From there, we can retouch the image as we see fit, but the important takeaway is that we’ve now made an image that has the entire car in focus, with the background blurred. I’m excited to give more scenes a try!
Feel free to email me at mike@machineswithsouls.com with any questions.
Follow along on Instagram @machineswithsouls
Legal
Due to factors beyond the control of Machines With Souls LLC and Mike D’Ambrosio, I cannot guarantee against improper use or unauthorized modifications of this information. Machines With Souls LLC and Mike D’Ambrosio assumes no liability for property damage or injury incurred as a result of any of the information contained in this post. Use this information at your own risk. Machines With Souls LLC and Mike D’Ambrosio recommends safe practices when working on vehicles and or with tools seen or implied in this post. Due to factors beyond the control of Machines With Souls LLC and Mike D’Ambrosio, no information contained in this post shall create any expressed or implied warranty or guarantee of any particular result. Any injury, damage, or loss that may result from improper use of these tools, equipment, or from the information contained in this post is the sole responsibility of the user and not Machines With Souls LLC or Mike D’Ambrosio.

One thought on “How to use VirtualRig Studio”
Comments are closed.