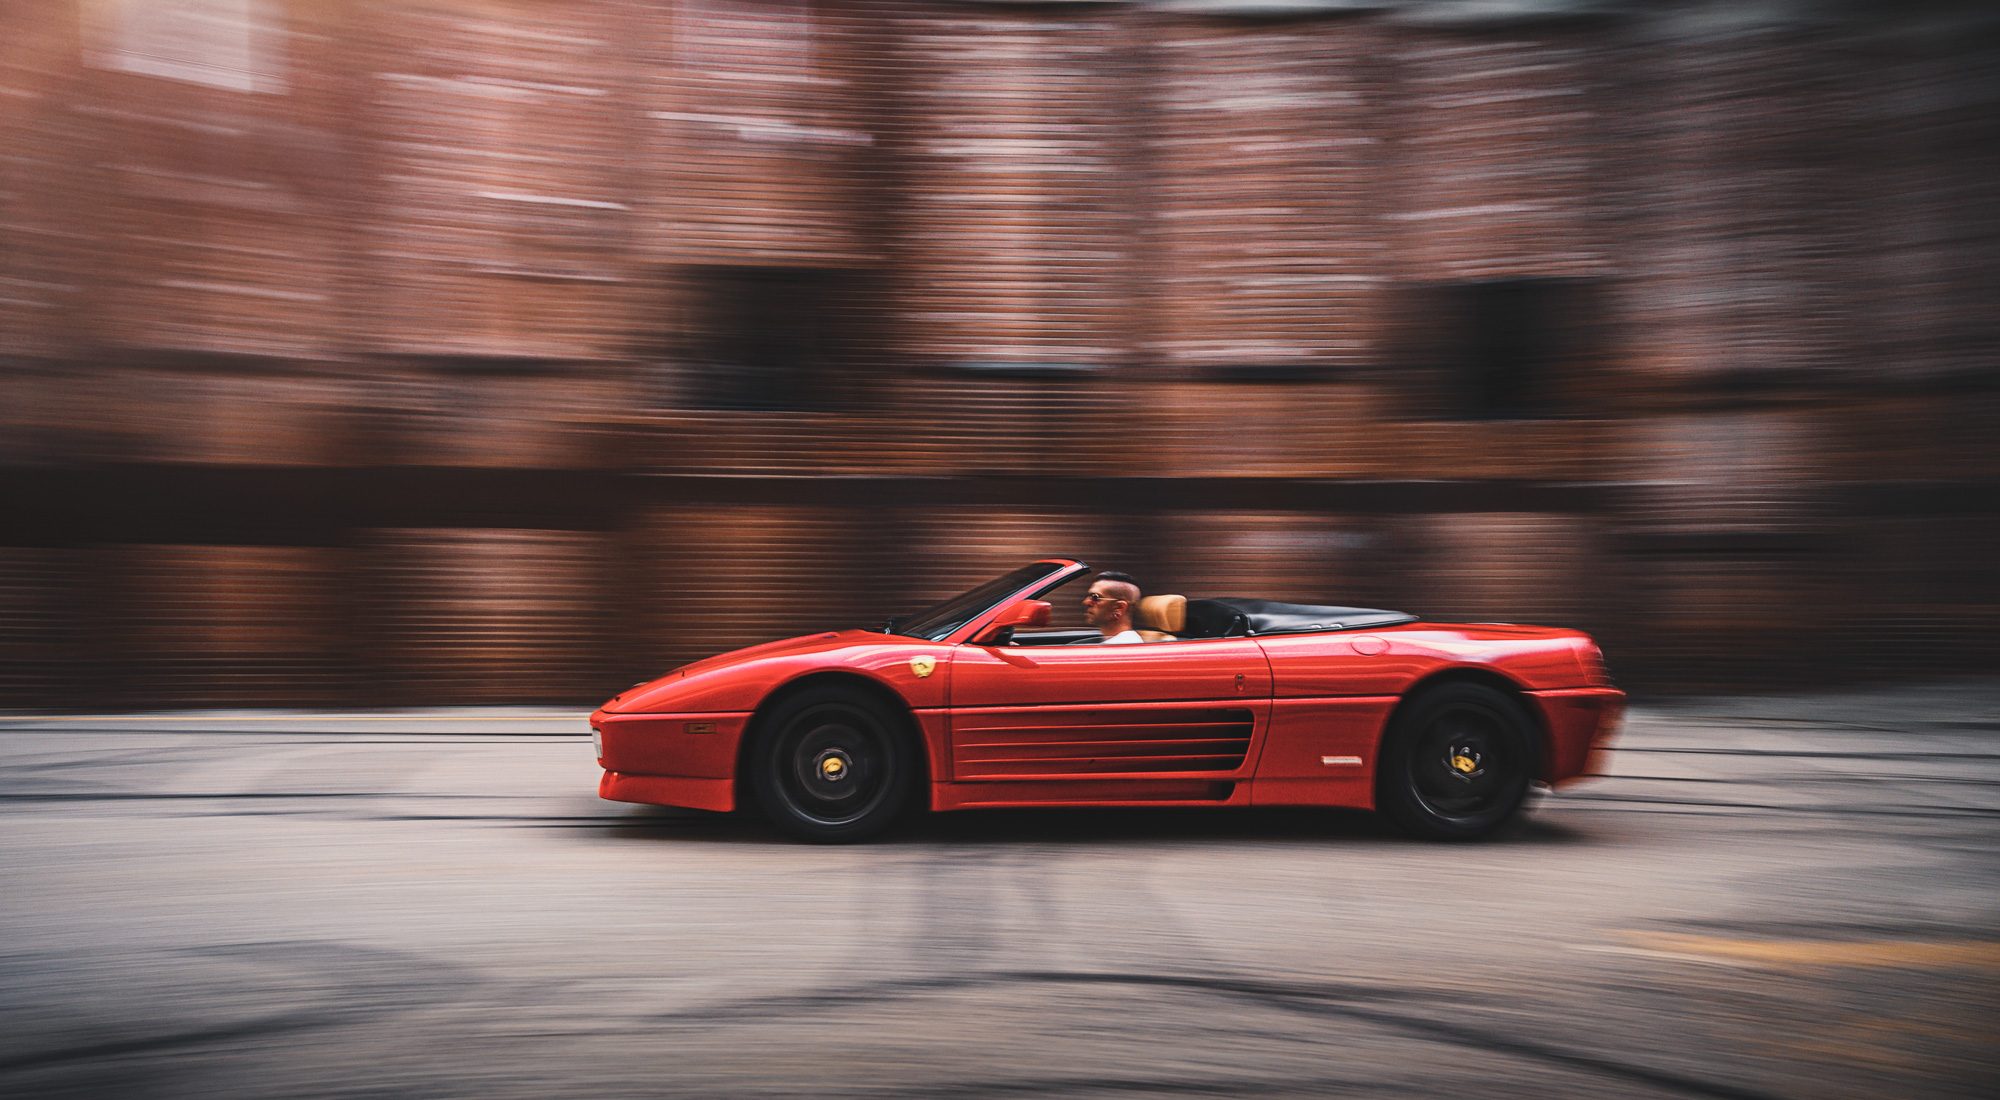

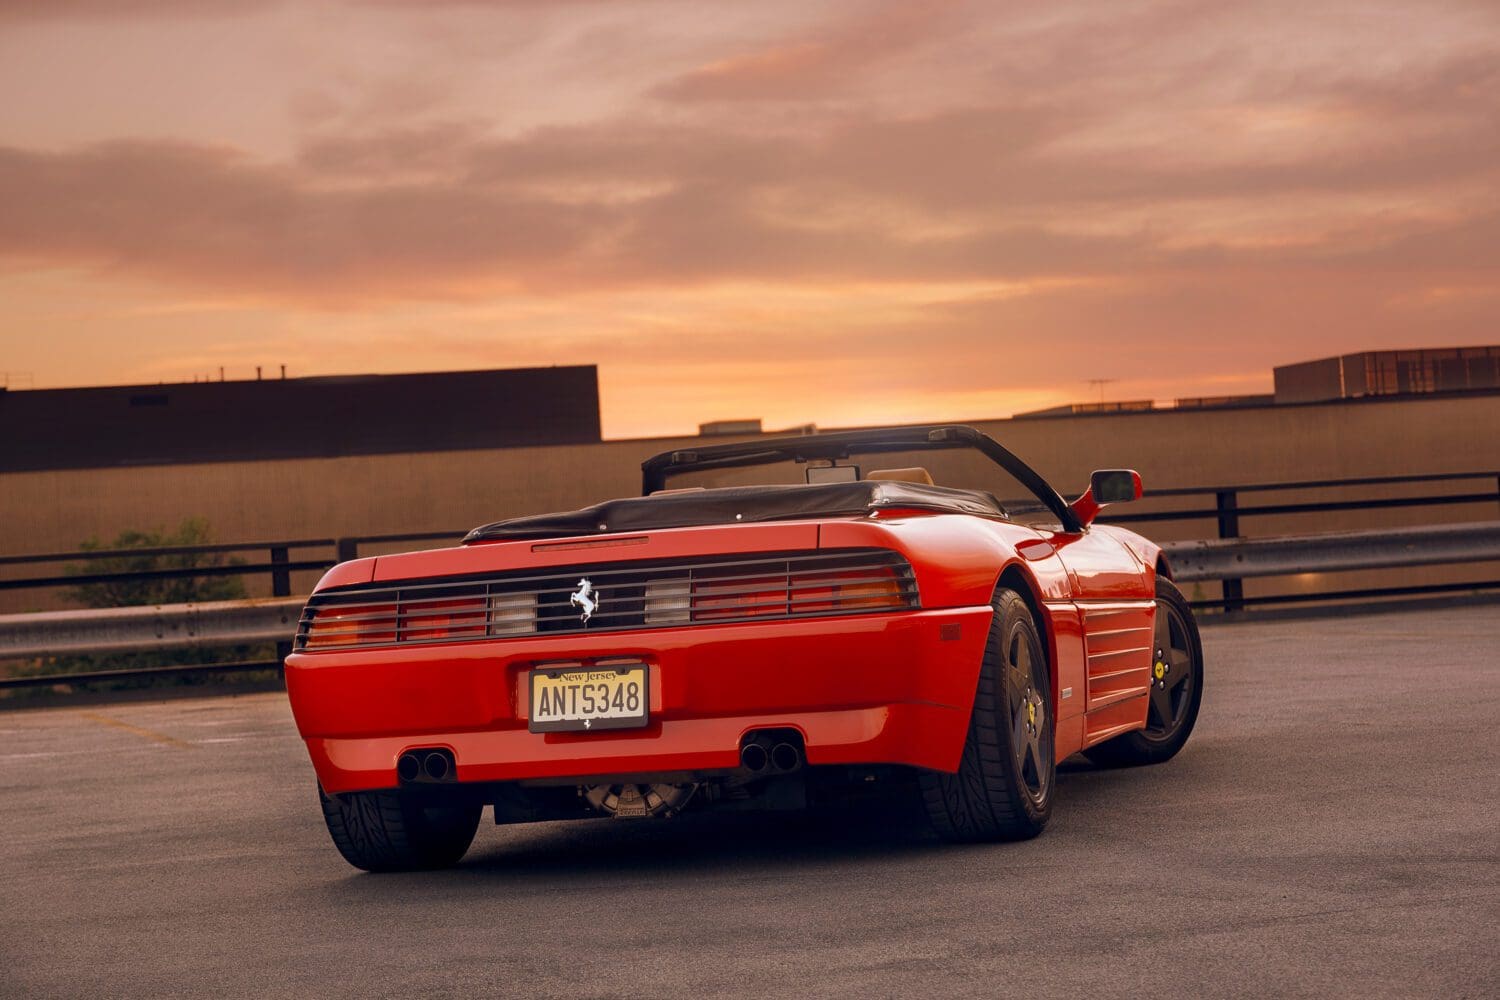
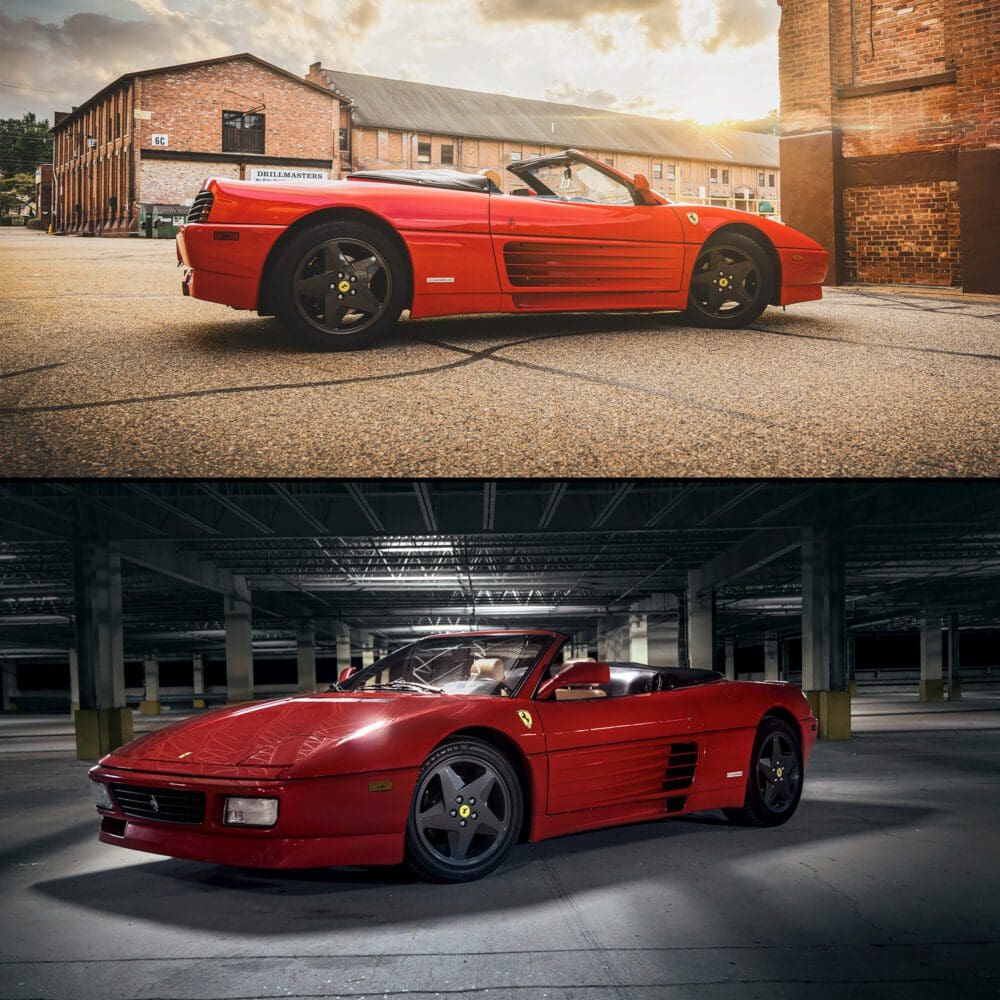
When Mr. T, aka @njmeteroman, called me up for a photo shoot with his Ferrari 348, I got pretty excited. Like any proper Ferrari owner, T loves his car, and this would be the second time I shot it. The first shoot produced some memorable images, including becoming wallpaper art for Jalopnik. So how could I not only reproduce the success, but top that first shoot? With 3 tips…
1 – Change up your location
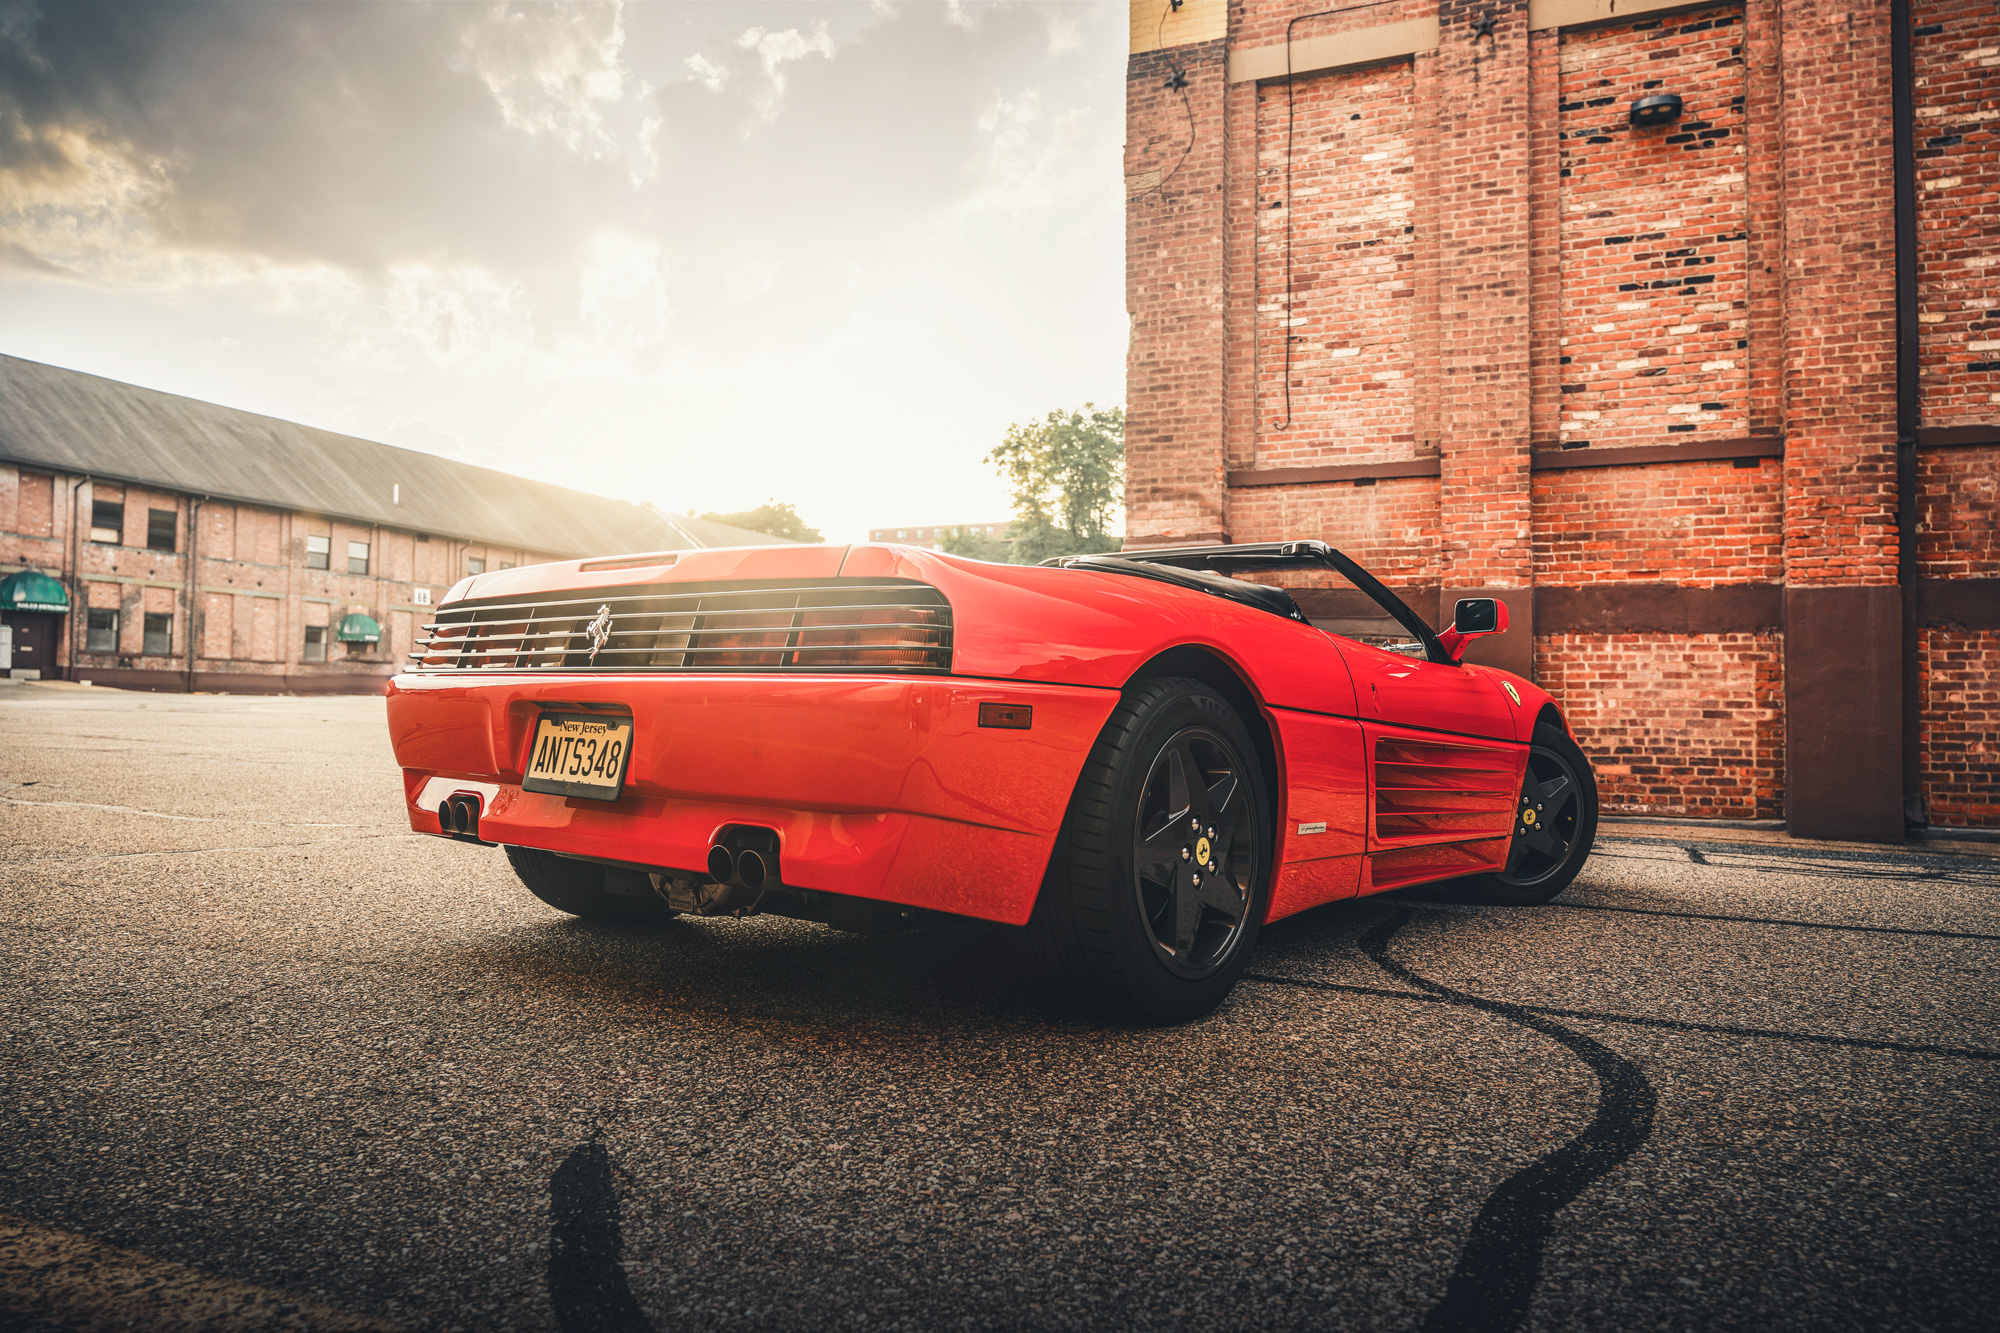
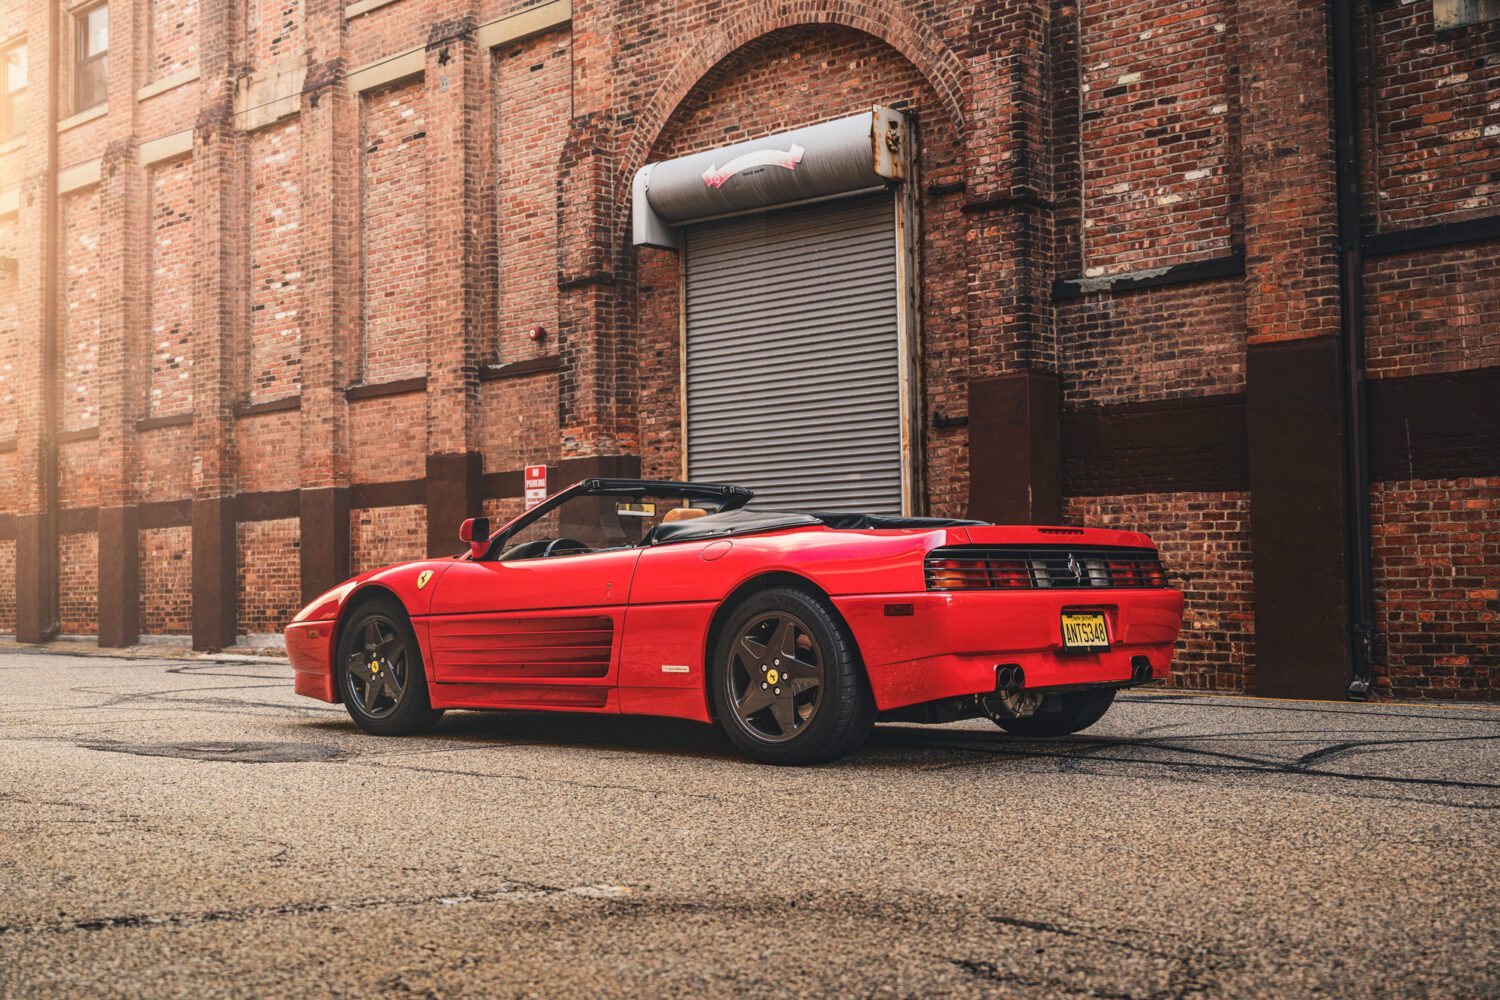
Most obvious – don’t go back to the same spot unless you want the same images. Our first shoot took place in a mall parking lot, but angled in a way that you could not tell. This time, I wanted something more open, and a nearby abandoned factory proved to be a great spot. The bricks help offset the color of the car nicely while providing a cool industrial backdrop. Though both sets were shot during sunset hours, and even during the same time of year, but the sky is never the same, and here, some clouds helped give the sunlight something to play off of.
2- Change up your concept
I’ve grown as an artist quite a bit in the 2 years since I’ve last shot the 348, so how could I bring some of those new tricks along? Roller shots, getting low, and perfecting the sunset would give me the new look I was after. As a general rule, I try not to shoot the same car too closely together for risk of getting bored and not giving yourself the chance to show some growth.
3- Change up your angle
Check back with your original shoot and remind yourself: “What did I miss, or what do I wish I had seen?” On my first shoot, I found myself lacking in higher angles and any motion with the car whatsoever, so I made sure to capture them here.
As an aside, the original images were shot with my D5200, while my new set was with the Z7. Side by side, you can see how much sharper the Z7 is, but you might not have known if I didn’t point it out.
How I shot it
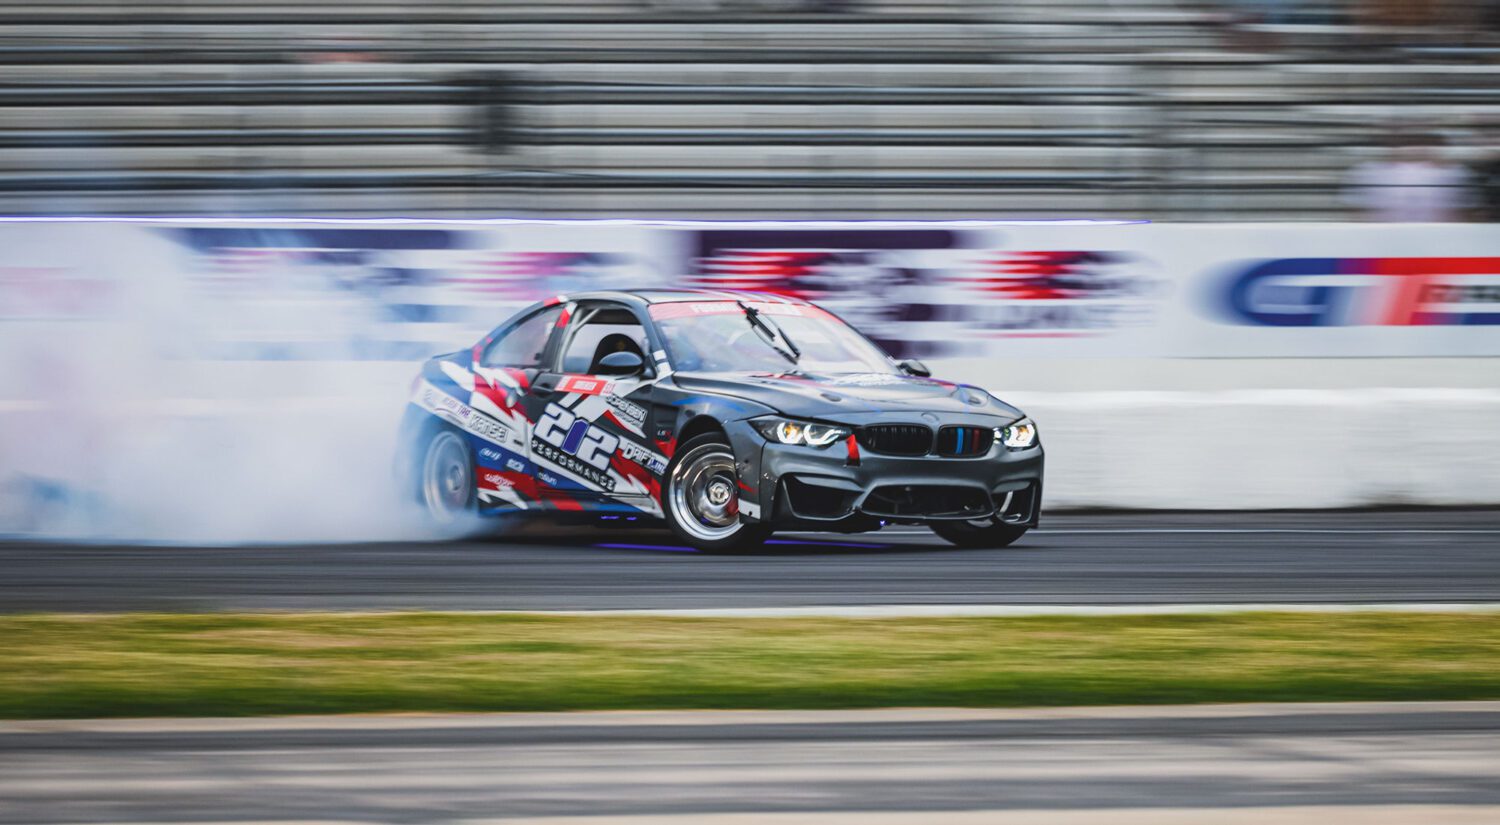
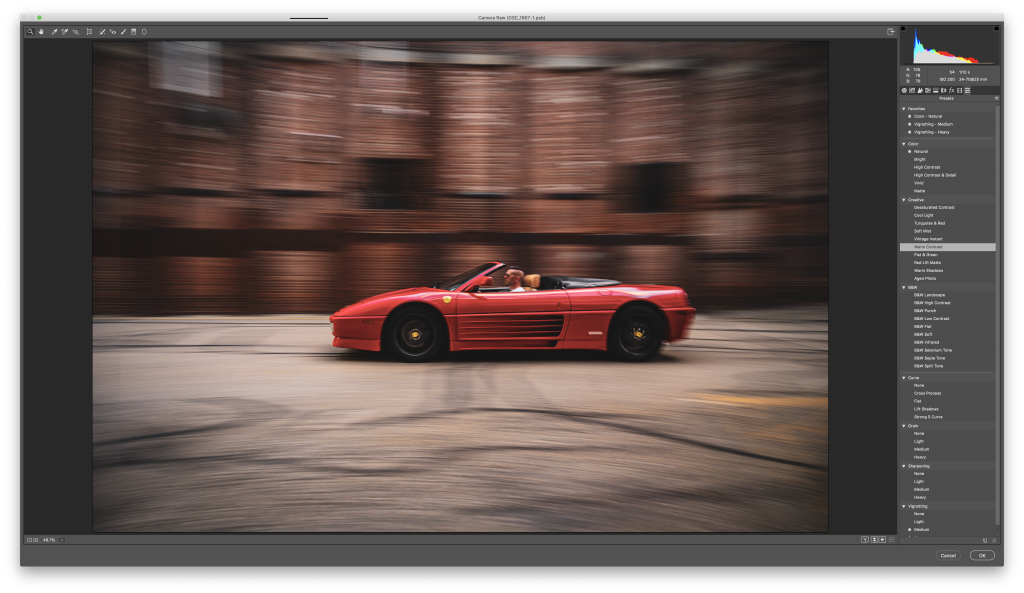
We’ll focus on the roller here, and I go in depth on the topic in this post.
I had Tony set up the car about 150 years down the road, and did multiple passes while I stood on a ramp for better elevation. The most common misconception here is that you need real speed, but you don’t, especially if you were close like I was. What you see here is about 10-15 mph.
Camera settings:
- f/4
- 1/10s
- 25mm focal length
- ISO: 200
LUT filters
As for retouching, you’ll often hear me say I use a LUT filter to add different effects to a photo. Embedded in Camera Raw (depending on which version you have), standard LUT filters change settings like shadow and contrast automatically for different effects, and you can layer them for an infinite combination of results to your images. My go-tos are usually “High-contrast”, then a layer of “Warm contrast”, and finally “Cross process”.
I’ll adjust the opacity of each layer, then combine the filters and flatten the image before adding one more: “Lift Shadow”, which provides an effect similar to “fade” on Instagram’s filter set.
Note: Special thanks to Mr. T, the owner of University of Don’t Be Stupid, a lifestyle company that reflects his personality, and aims to be a positive influence.
Feel free to email me at mike@machineswithsouls.com with any questions.
Follow along on Instagram @machineswithsouls

3 thoughts on “How I shot the Ferrari 348”
Comments are closed.